 "My bird IS the word" (mybirdistheword)
07/18/2018 at 18:08 • Filed to: FIRMLY GRASP IT, Wrenching, Trans Am
 0
0
 29
29|
"My bird IS the word" (mybirdistheword)
07/18/2018 at 18:08 • Filed to: FIRMLY GRASP IT, Wrenching, Trans Am | 0
| 29 |
This is a multi-faceted repair post.
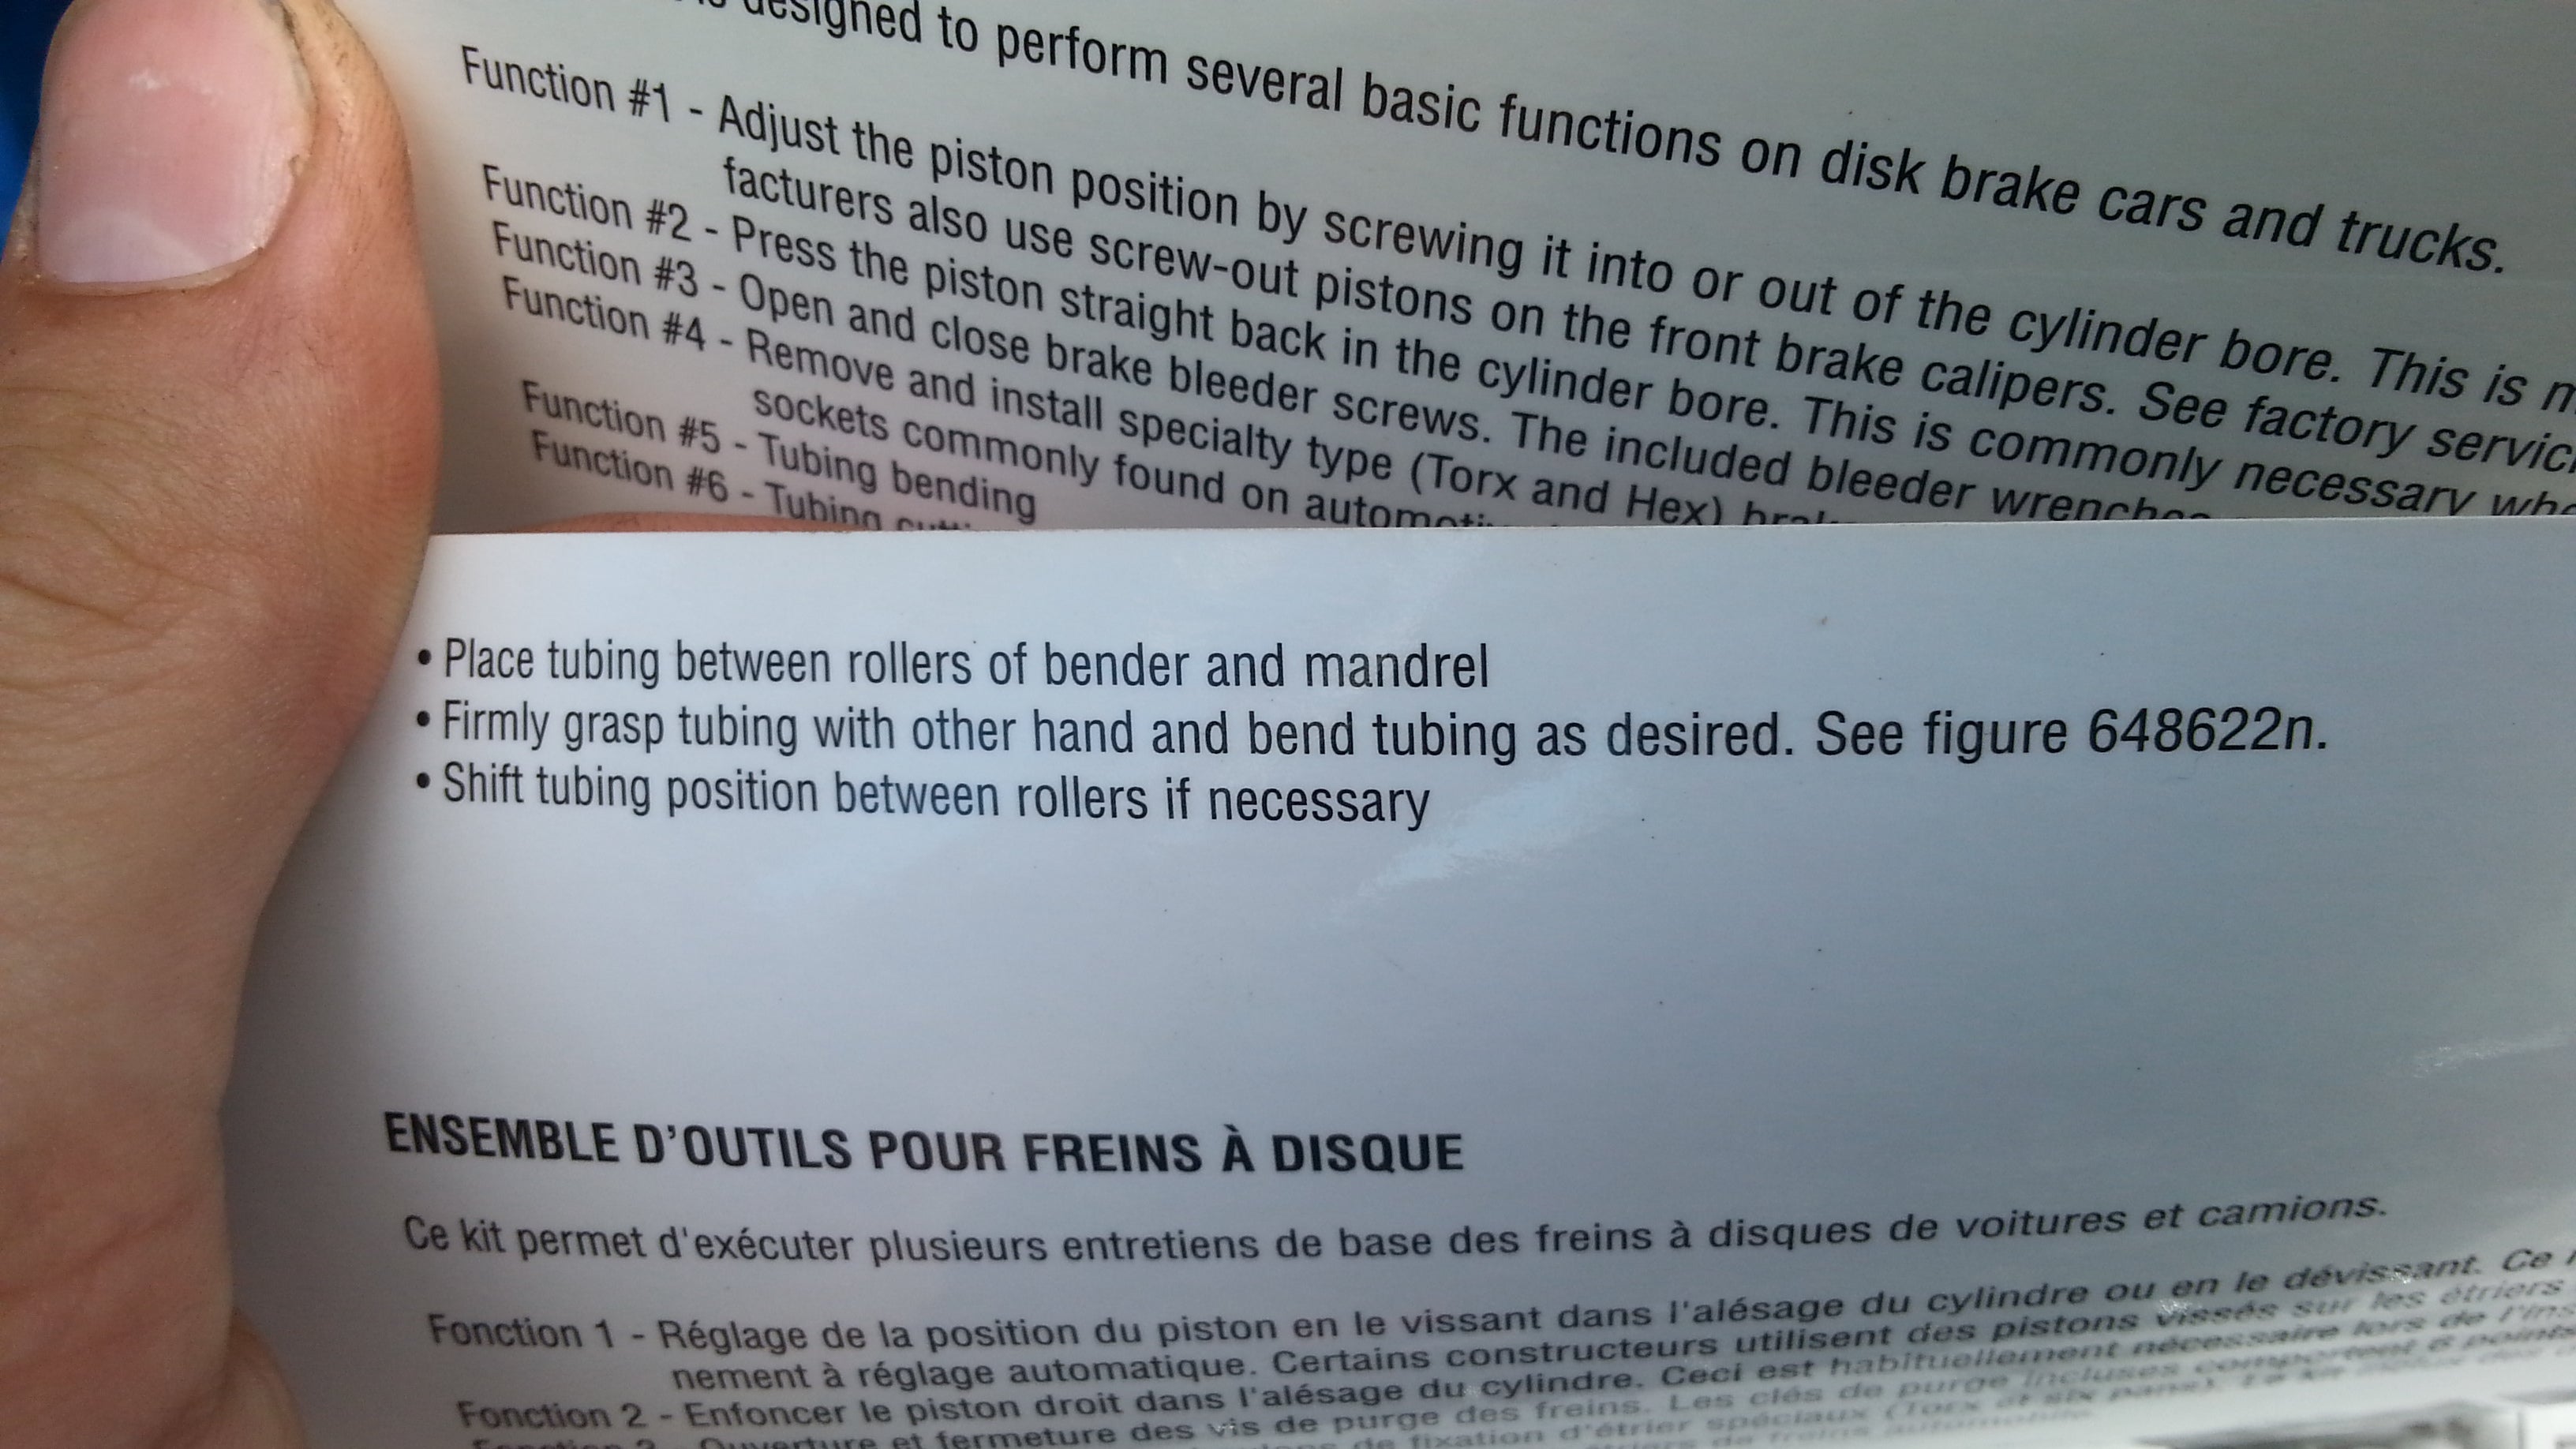
First things first: replacing the rubber parts of the fuel lines. It would appear that some parts of the metal lines arent flared at all, and some are:
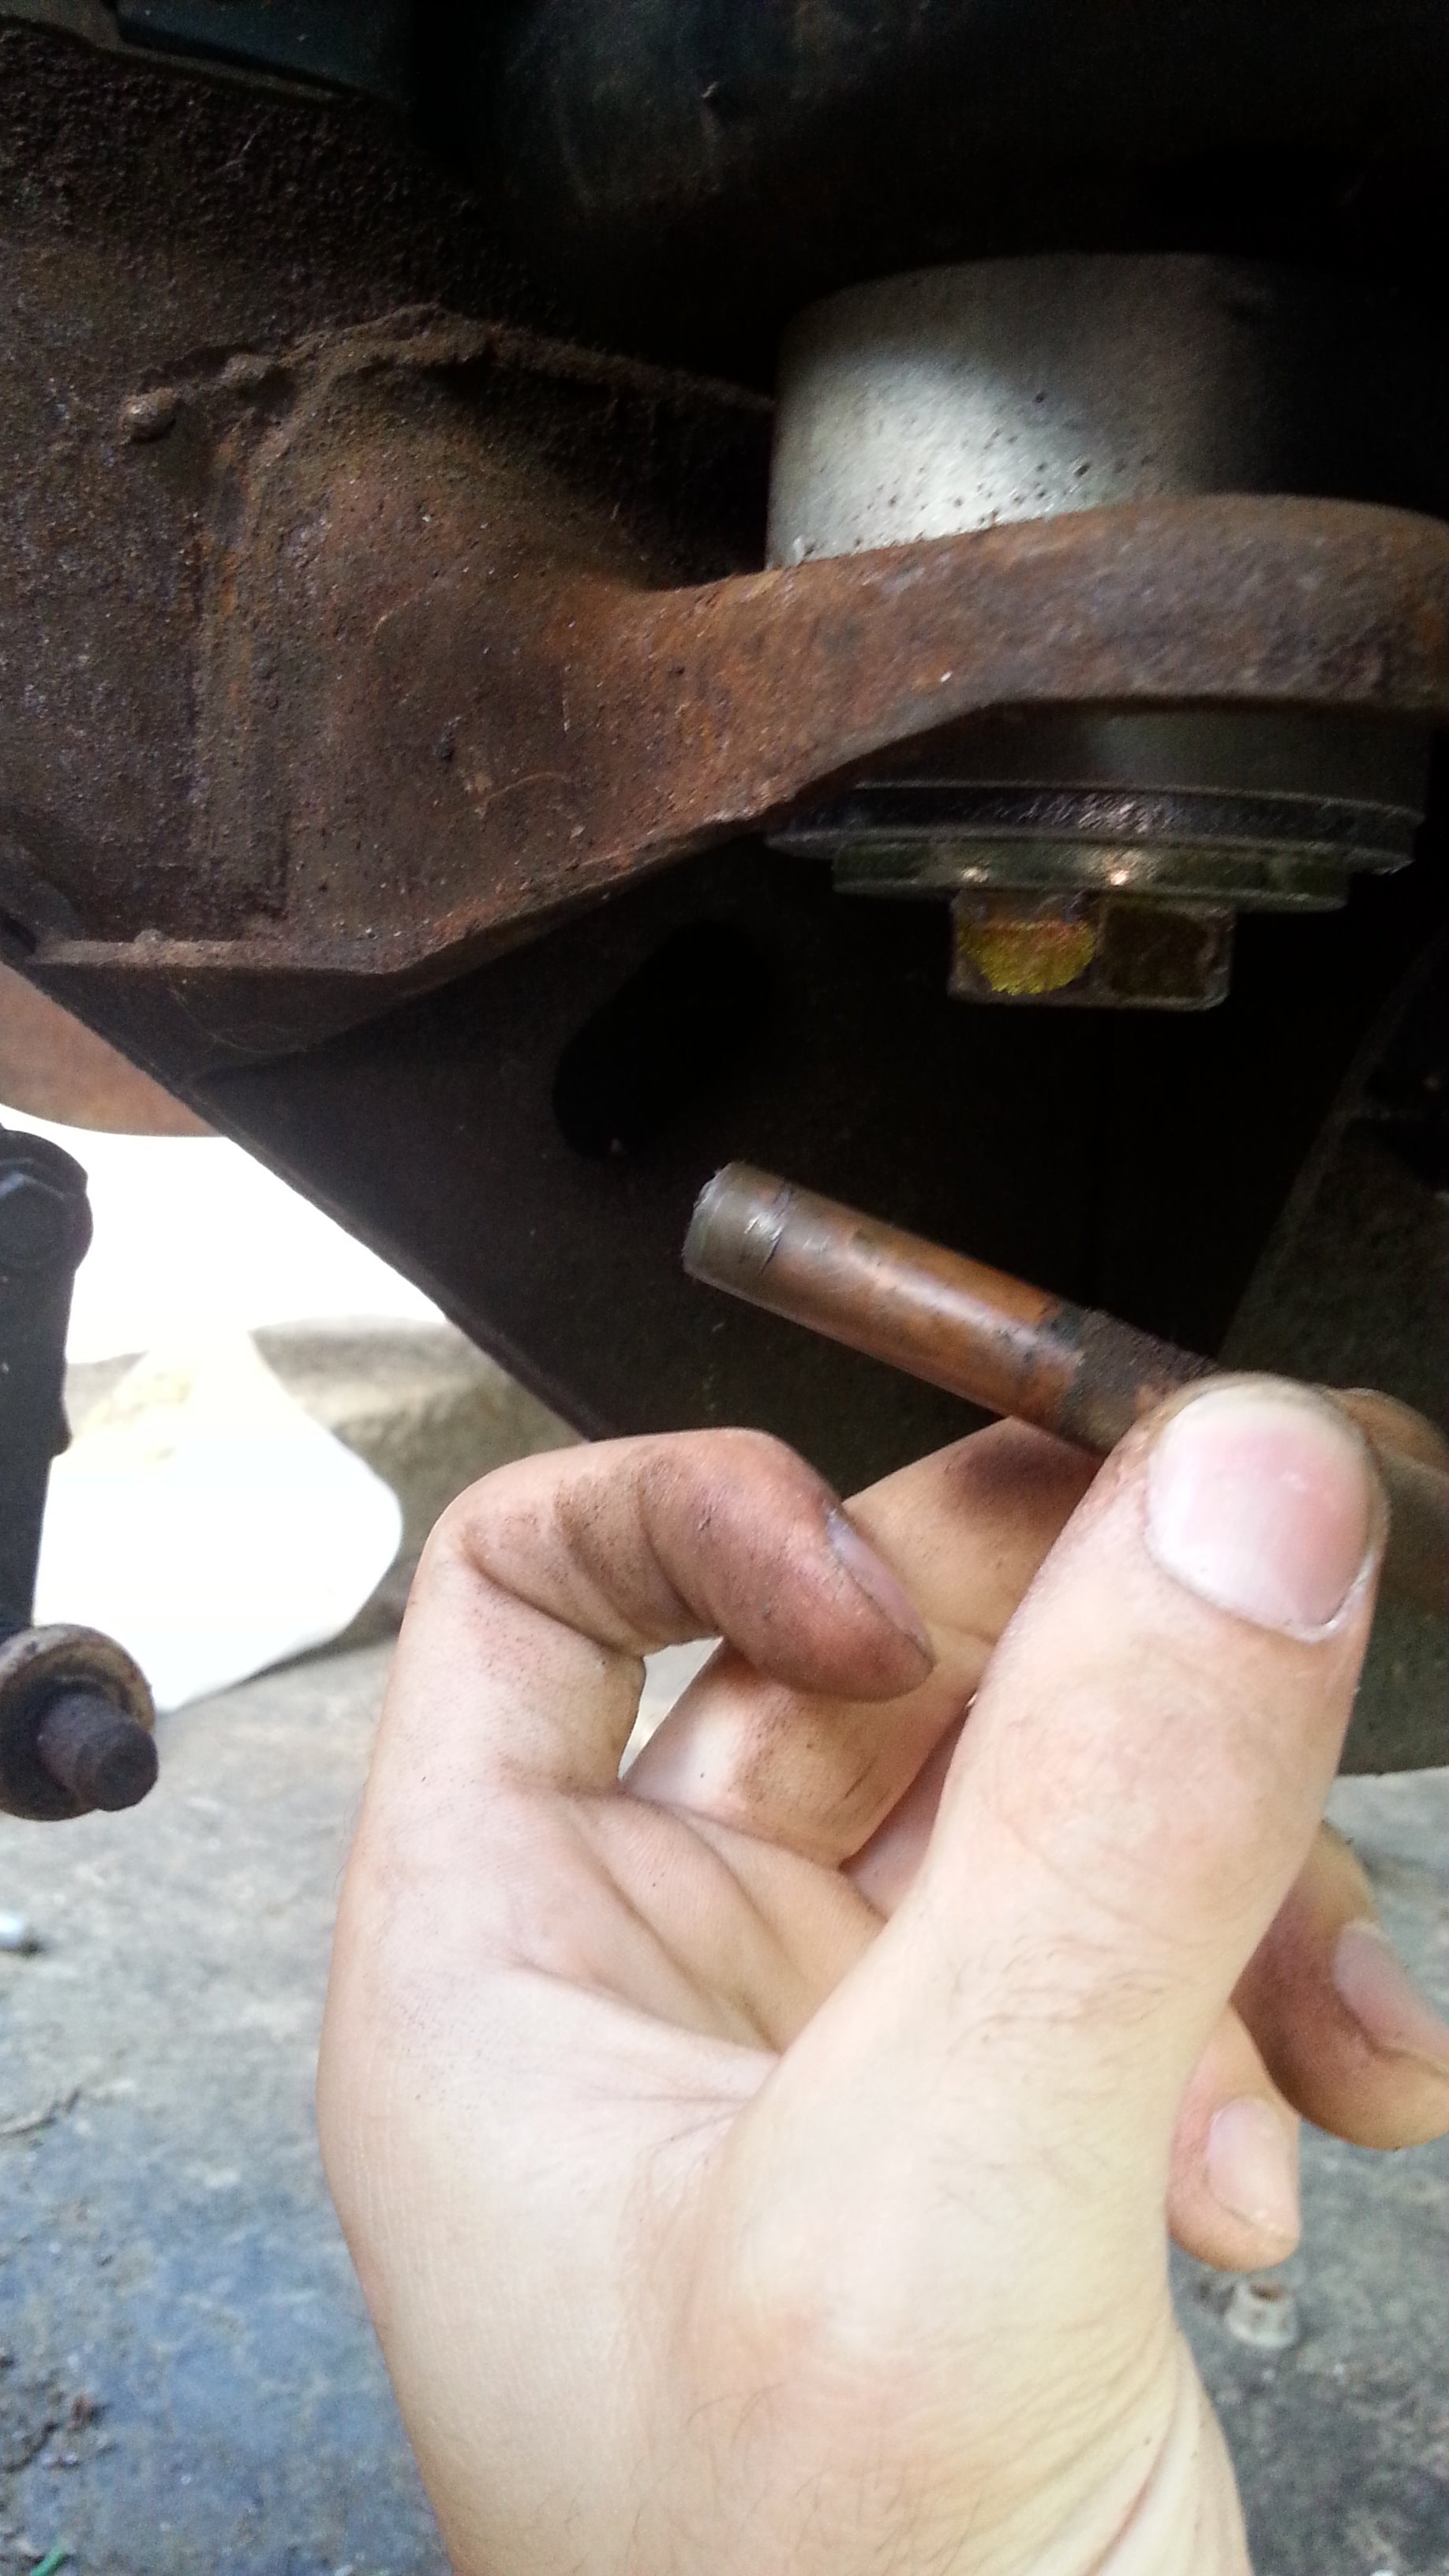
from the tank, and up to the firewall are not flared.
F
uel return , to gas tank and also the supply line that runs under the engine are flared. Not really sure what to make of this, what is actually original ect. ect. Just going to go with what is already on there. Going to just kinda double flare it instead of the full flare since that is too much to squeeze in the fuel hose.
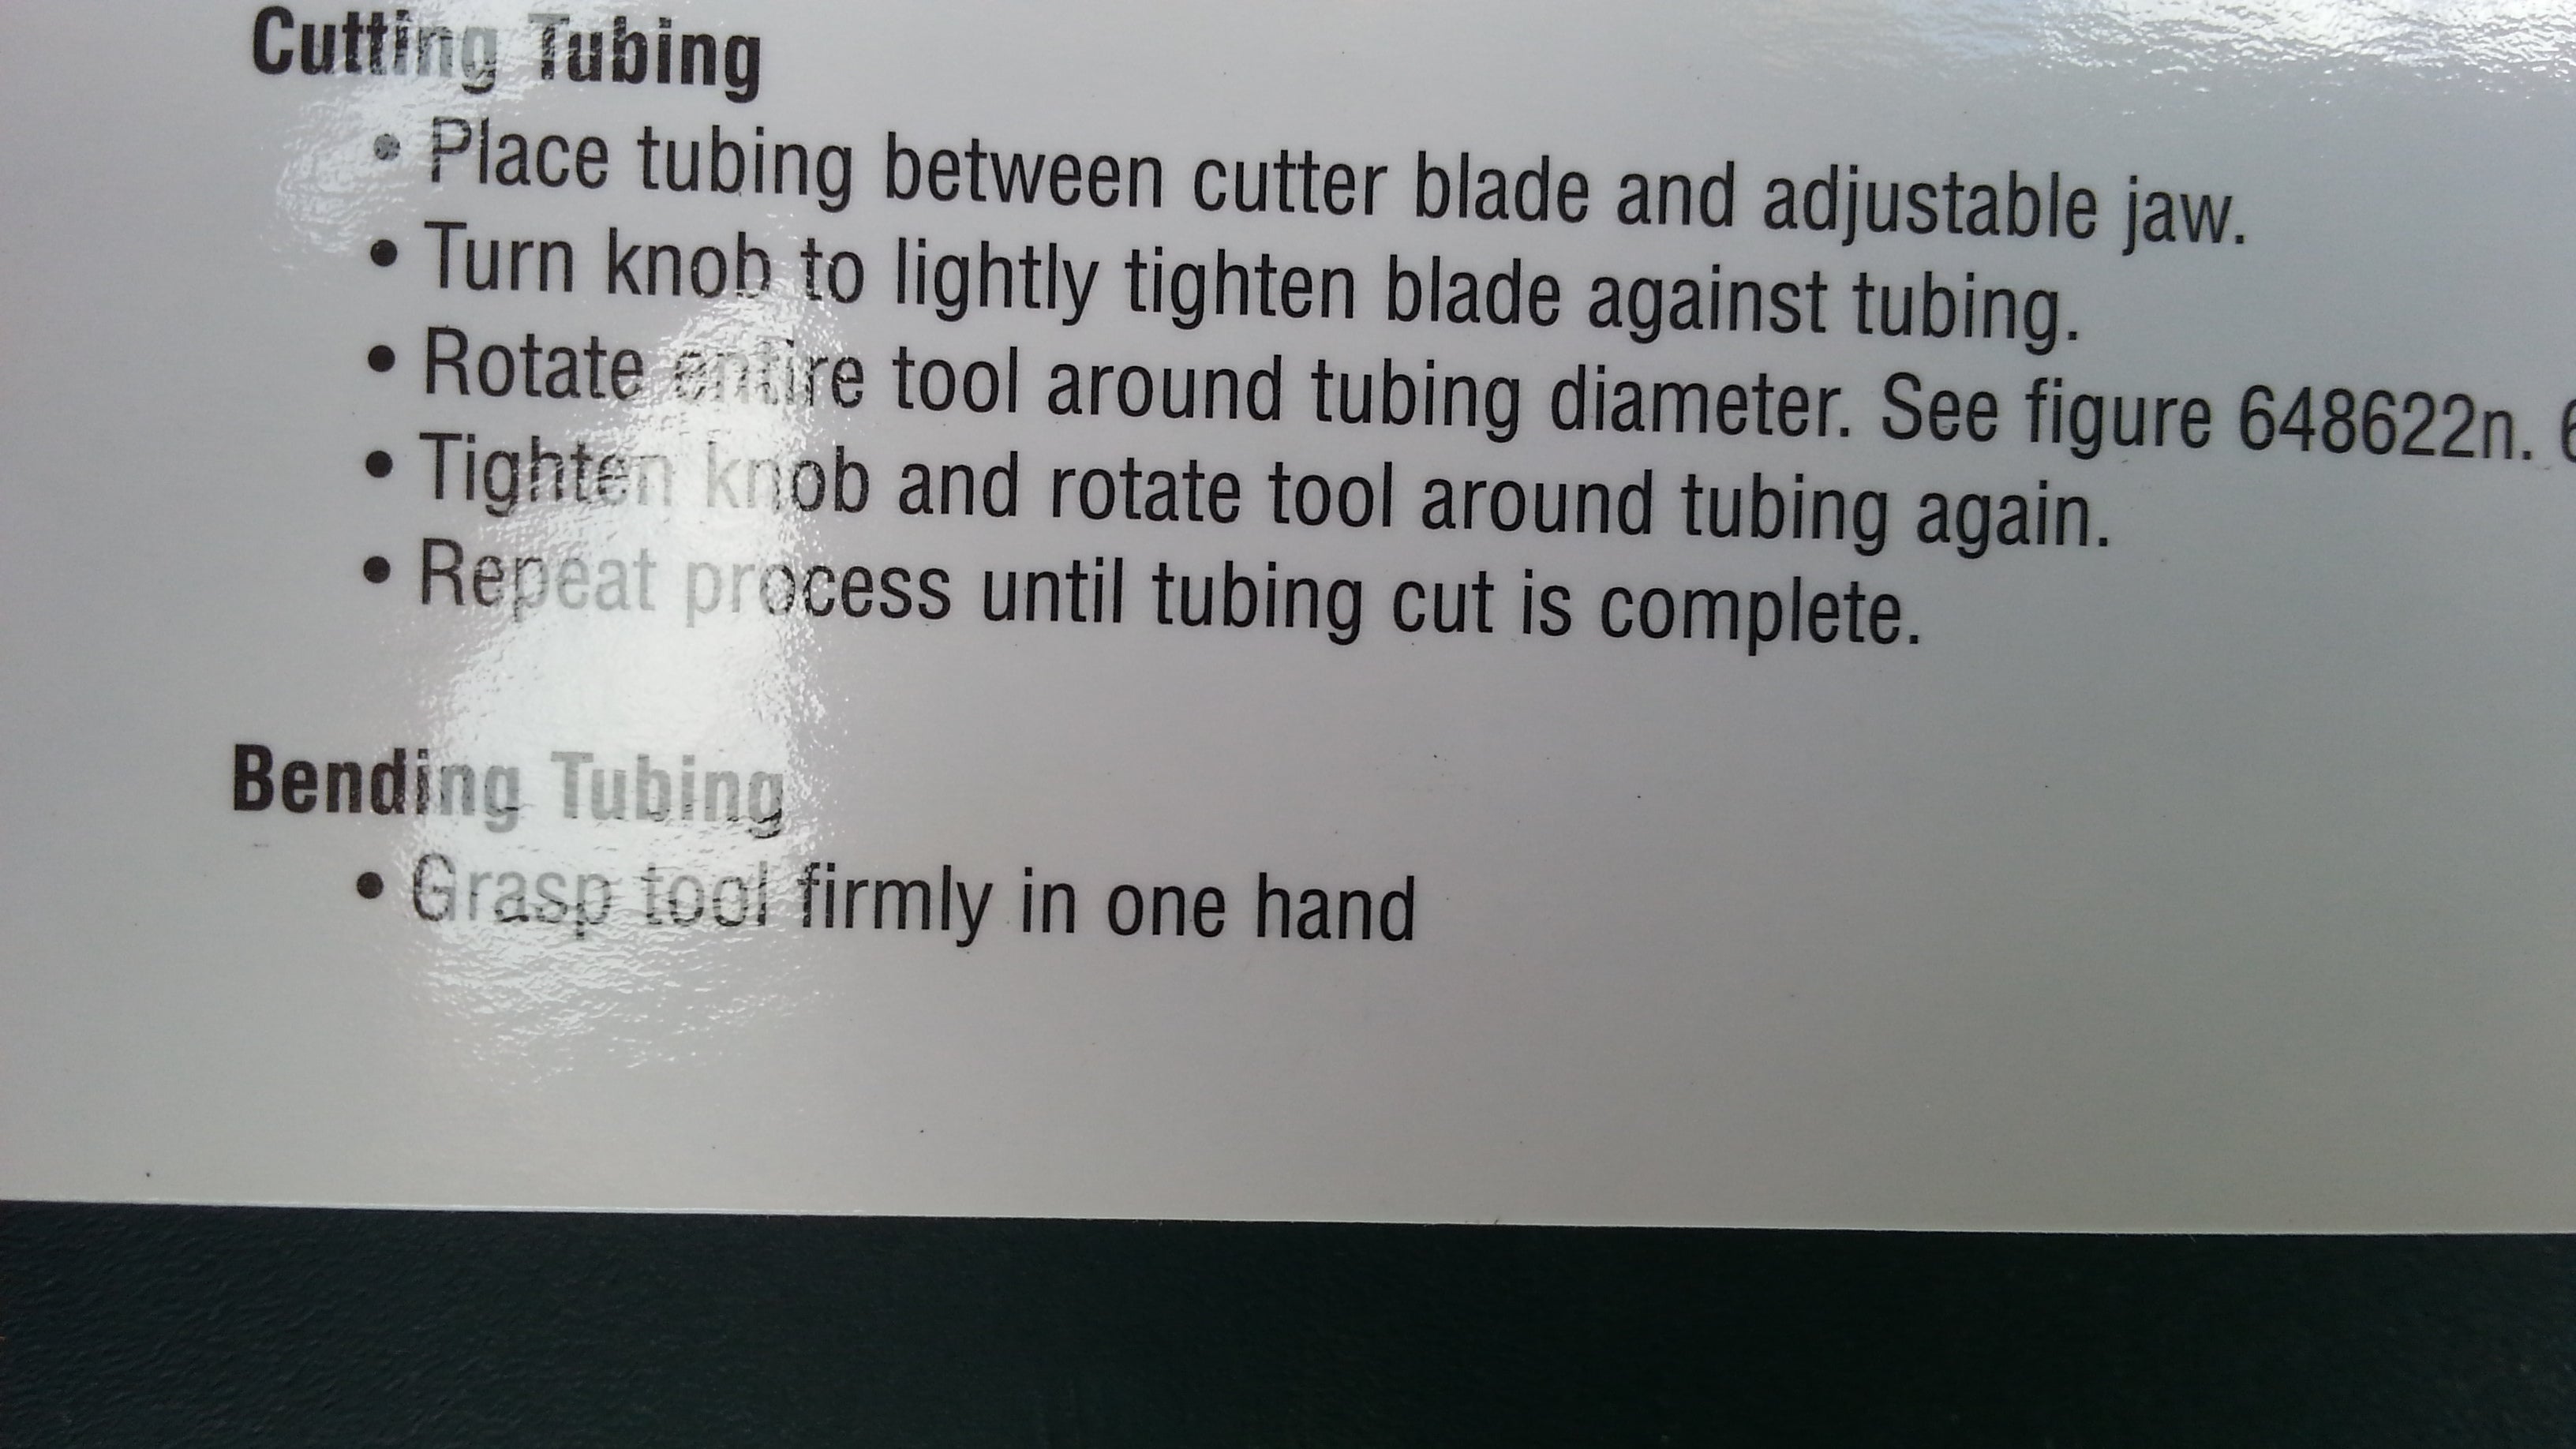
On to flaring and bending the new line, I rented the kit (actually 2 kits) from advance. E ssentially free, which is nice. W hat isn’t nice is this garbage:

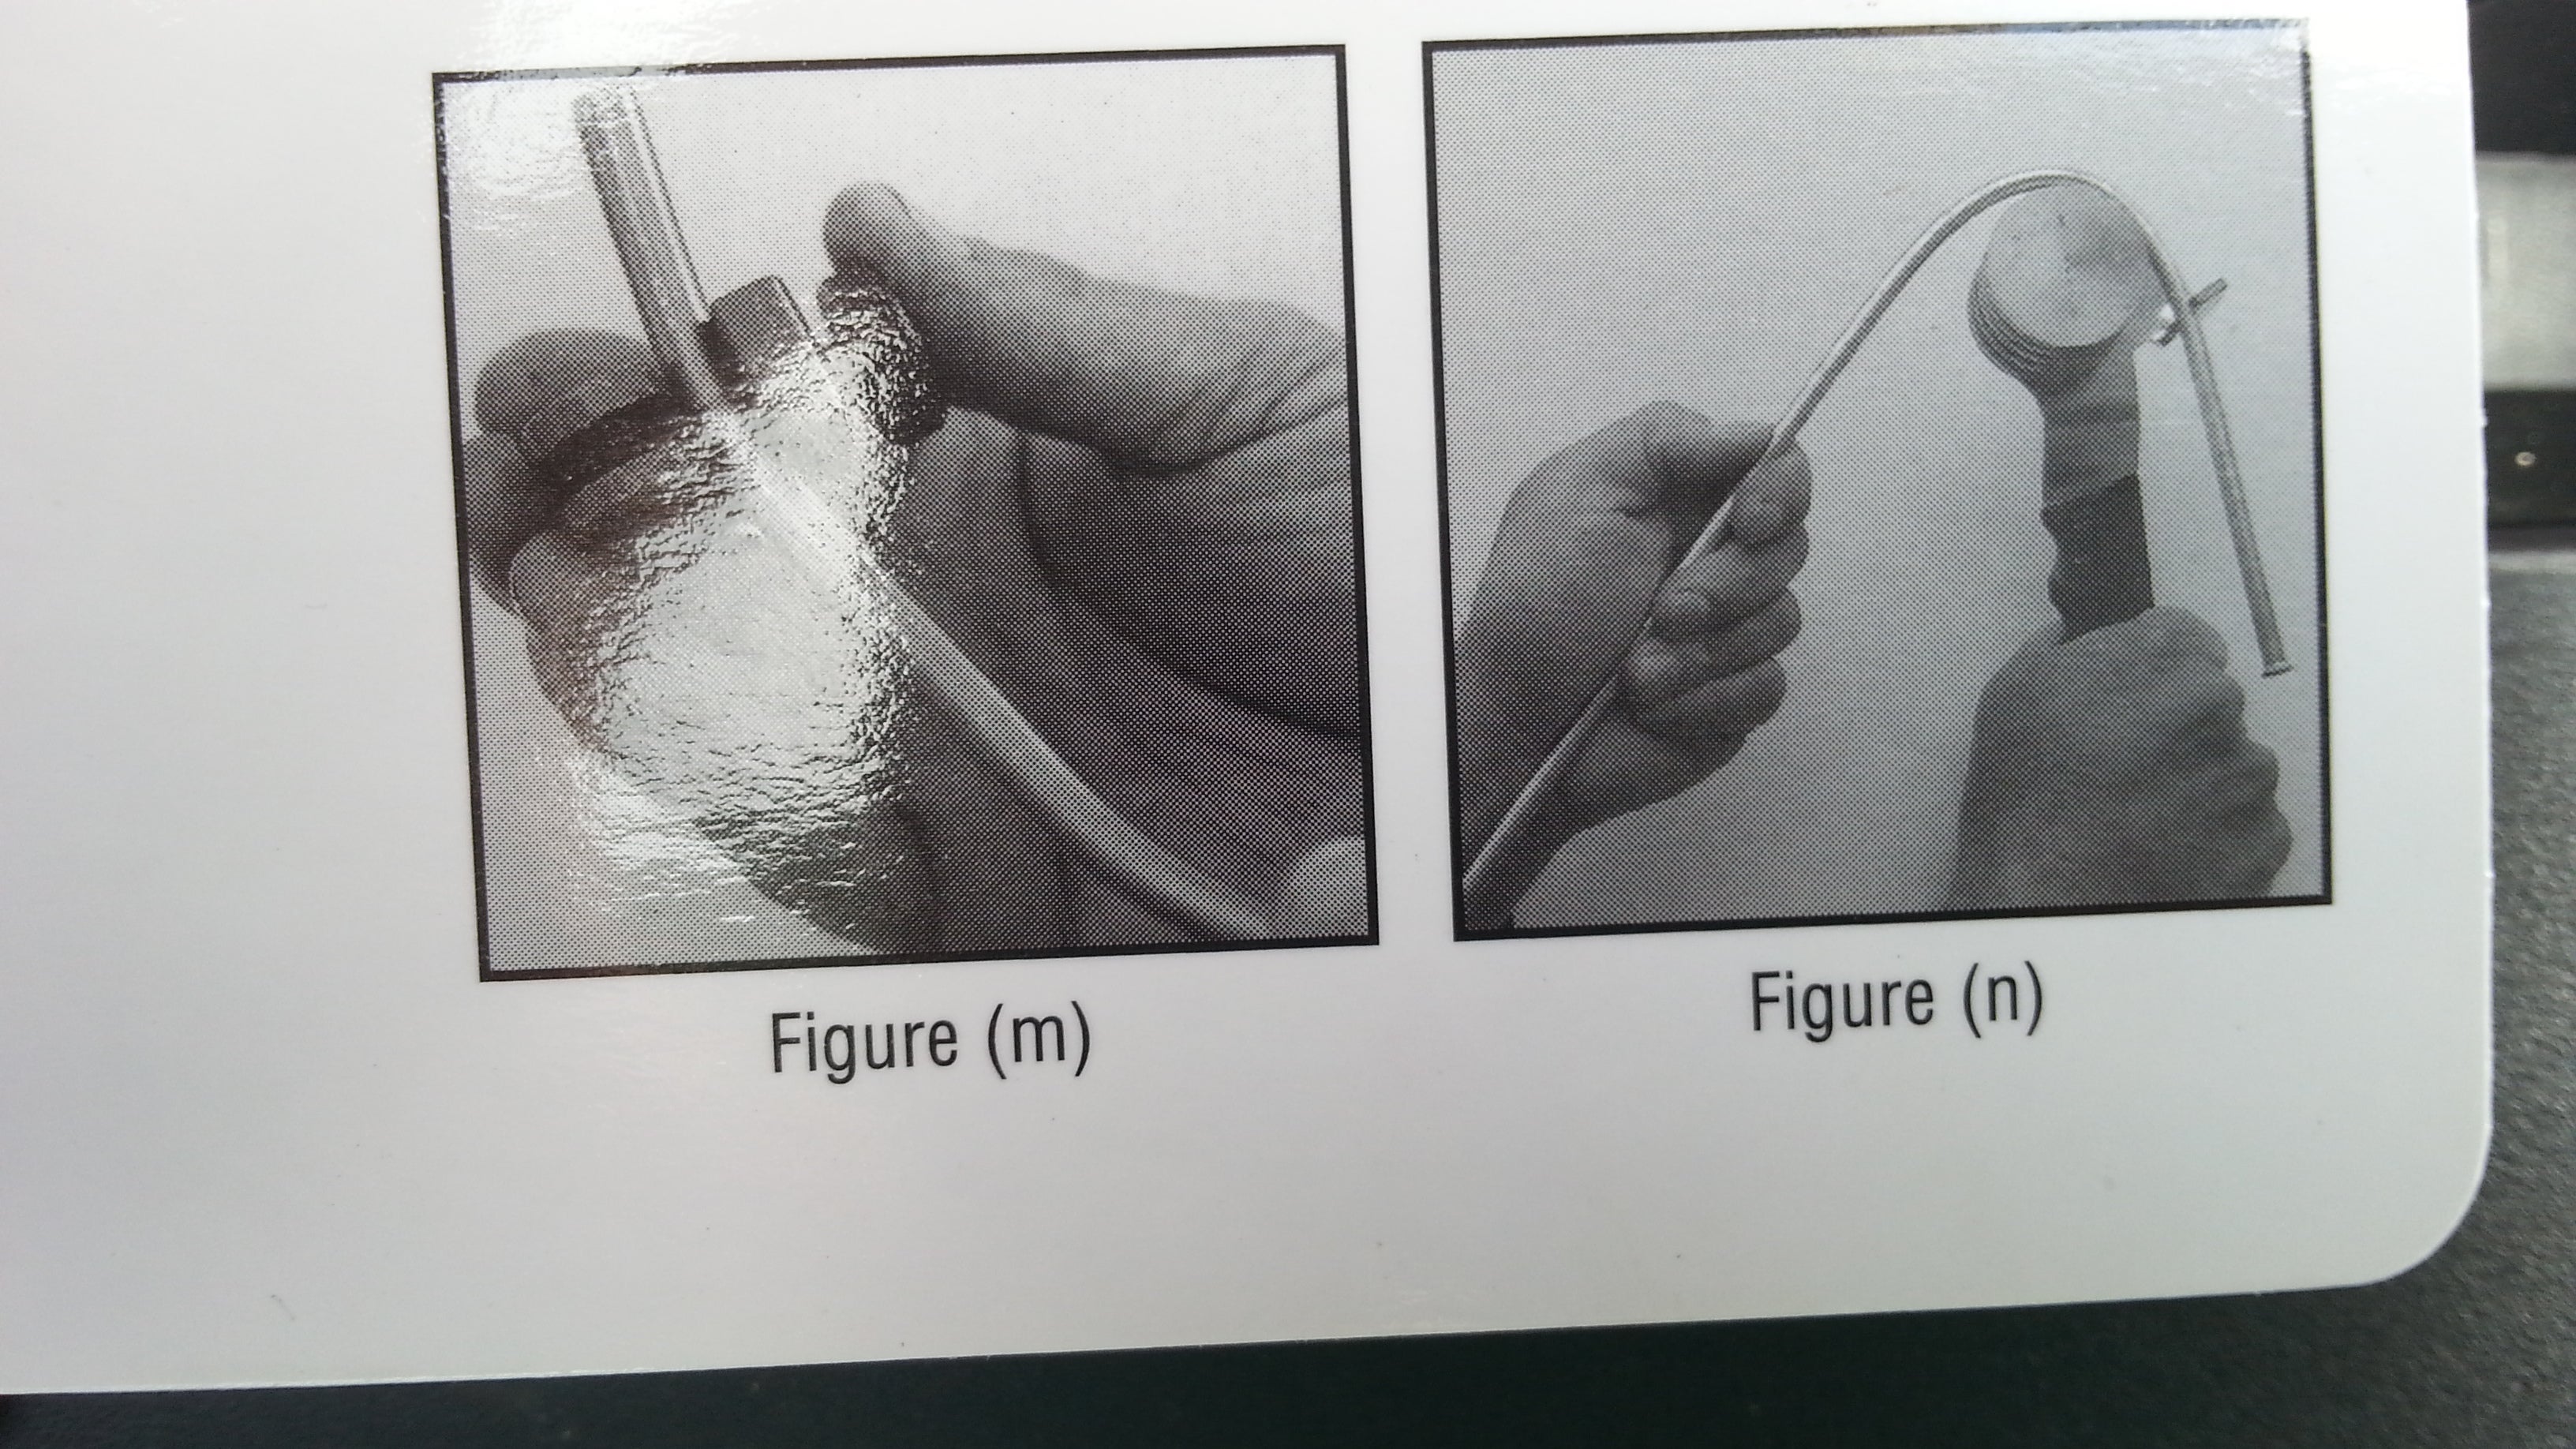
This arm is supposed to bend the tube without kinking it. it may even work for smaller lines. What it doesn’t work with, is the 3/8 supply line that I actually need it for.
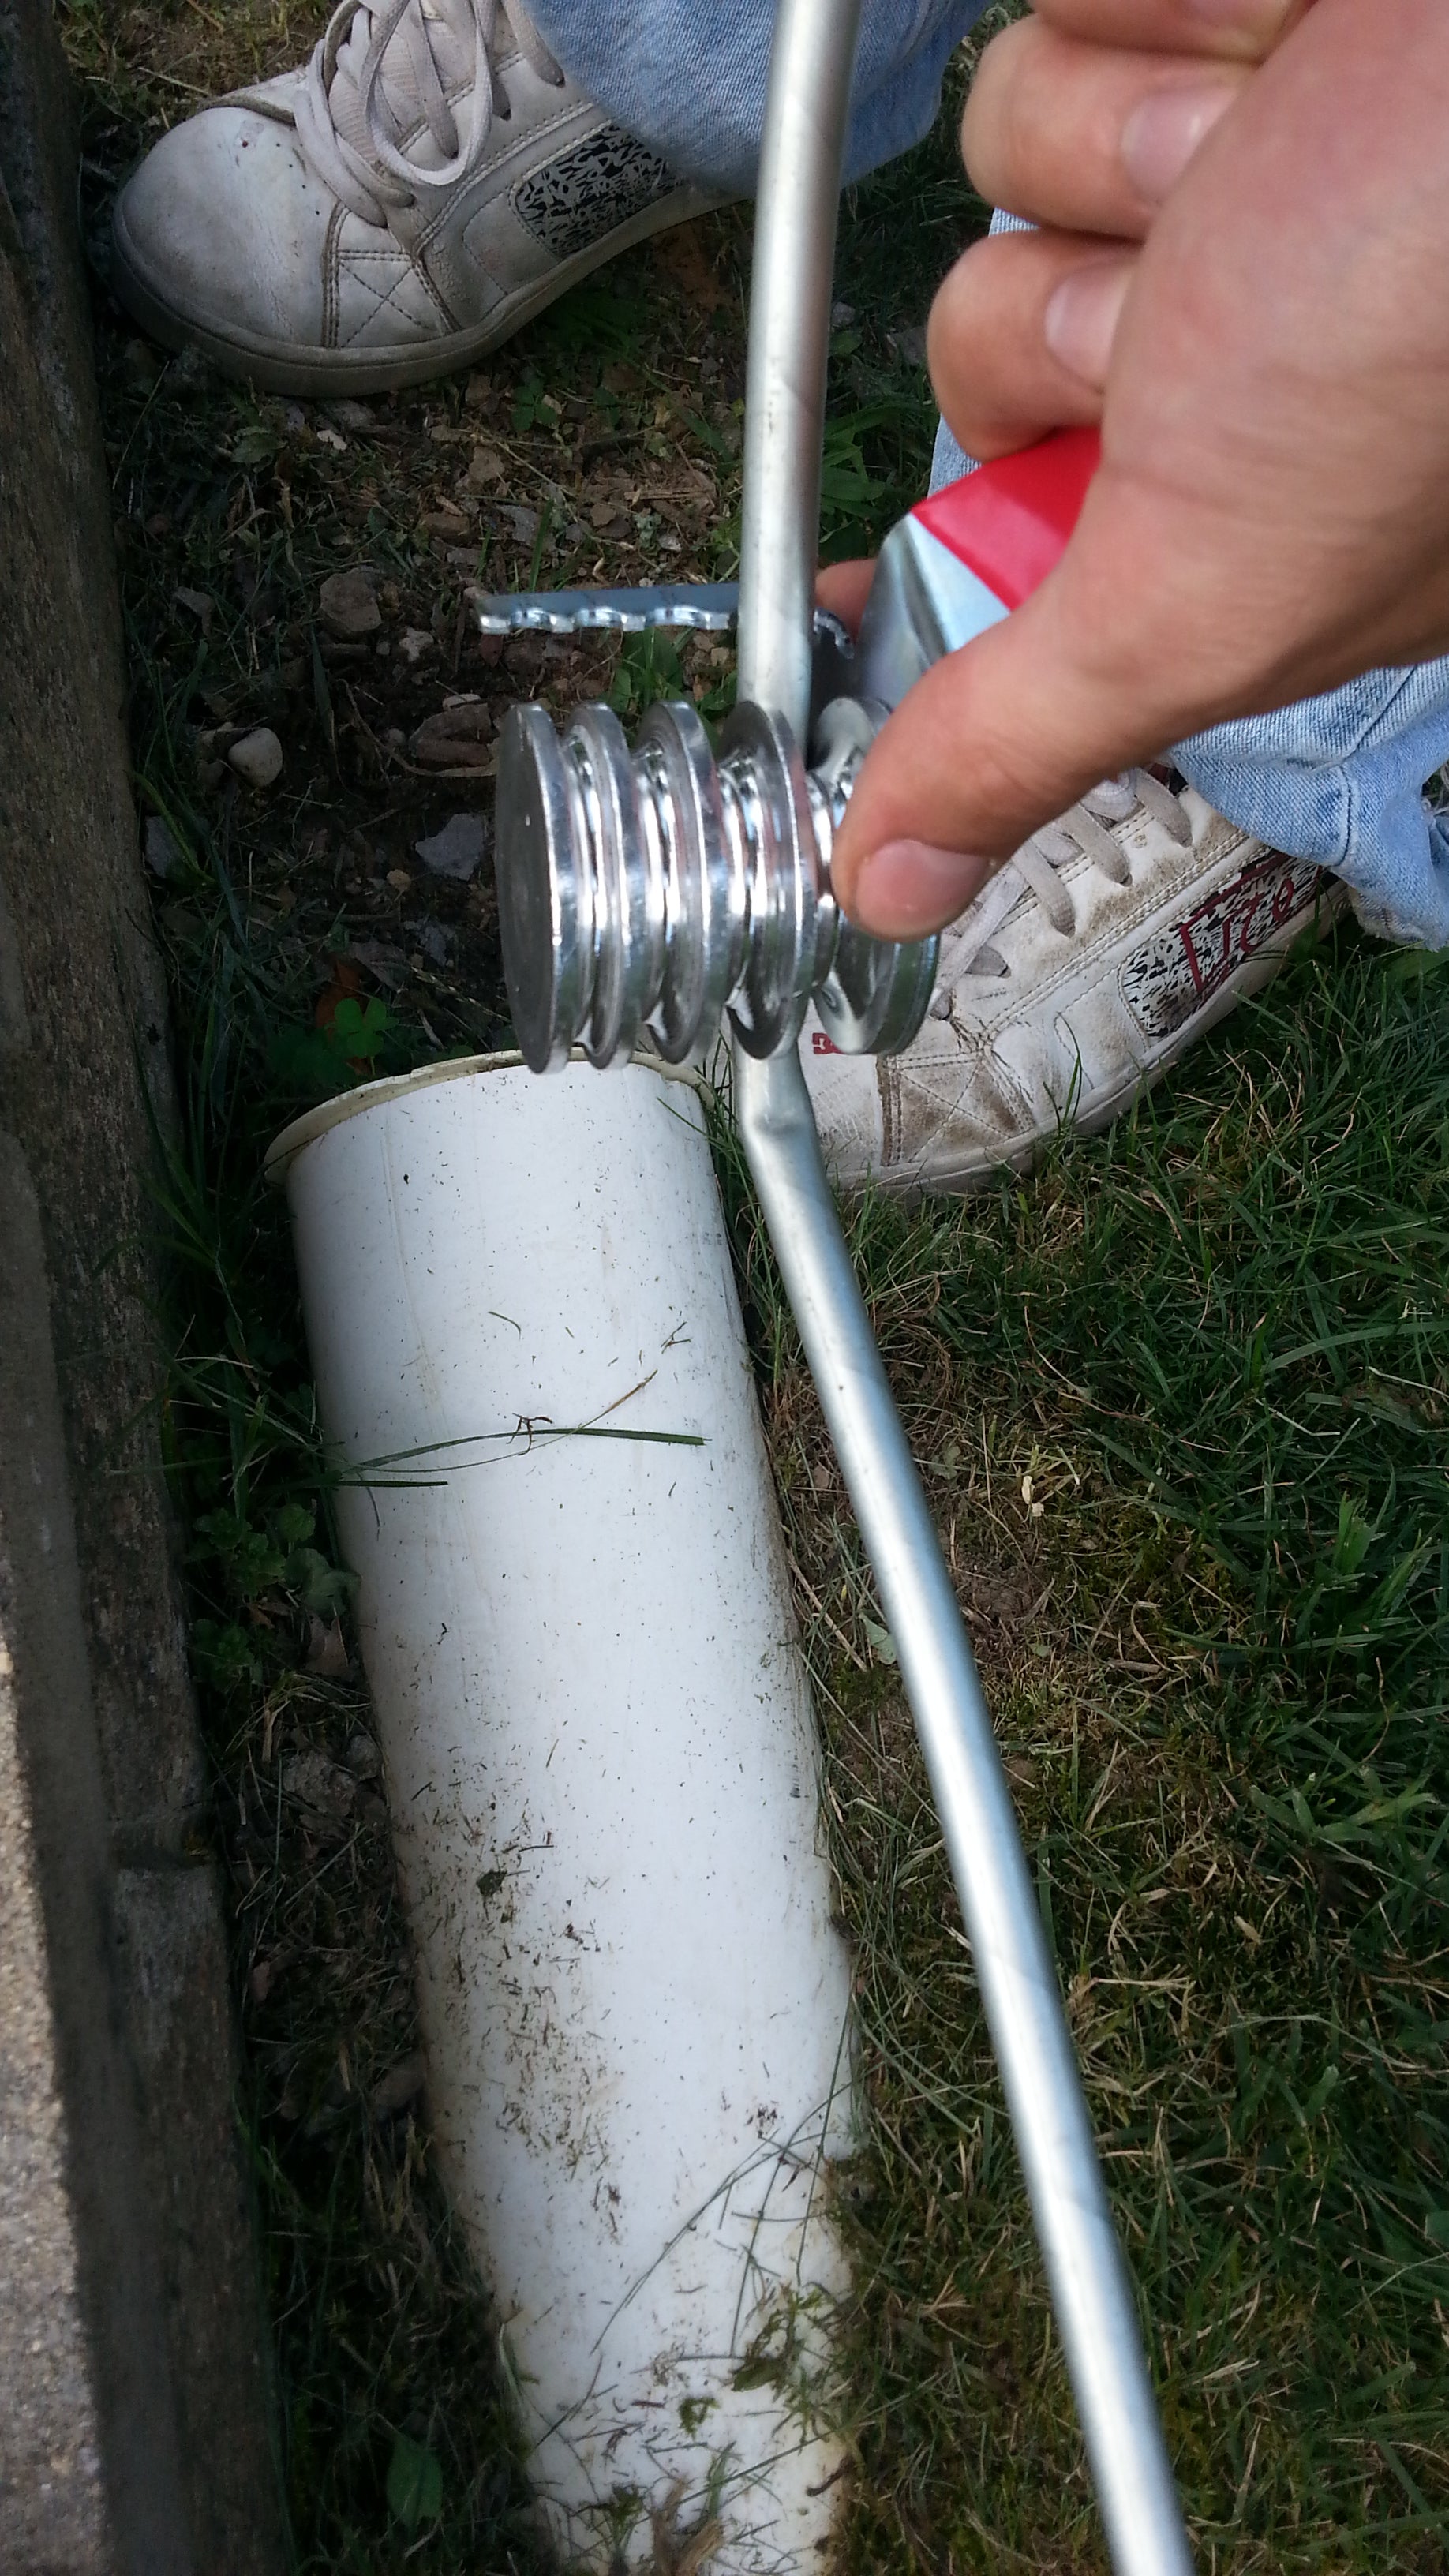

The damn thing has nothing to support the pipe (other than to firmly grasp
it by hand) so it only acts as a big lever to kink your pipe. I hope I can work this out or else I will need to go buy another line from NAPA (because I only need a short segment and nobody around here sells by the foot)
It doesn’t work. I am considering instead buying this:
!!! UNKNOWN CONTENT TYPE !!!
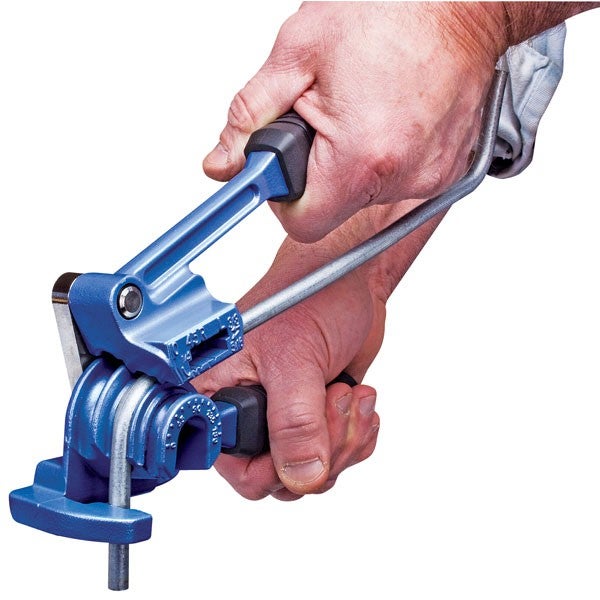
Seems to make much more sense to me. An actual fuckin tool. 30$ for the set, and then I have it.
So those of you body shop oppos: Am I dealing with a lost cause here?
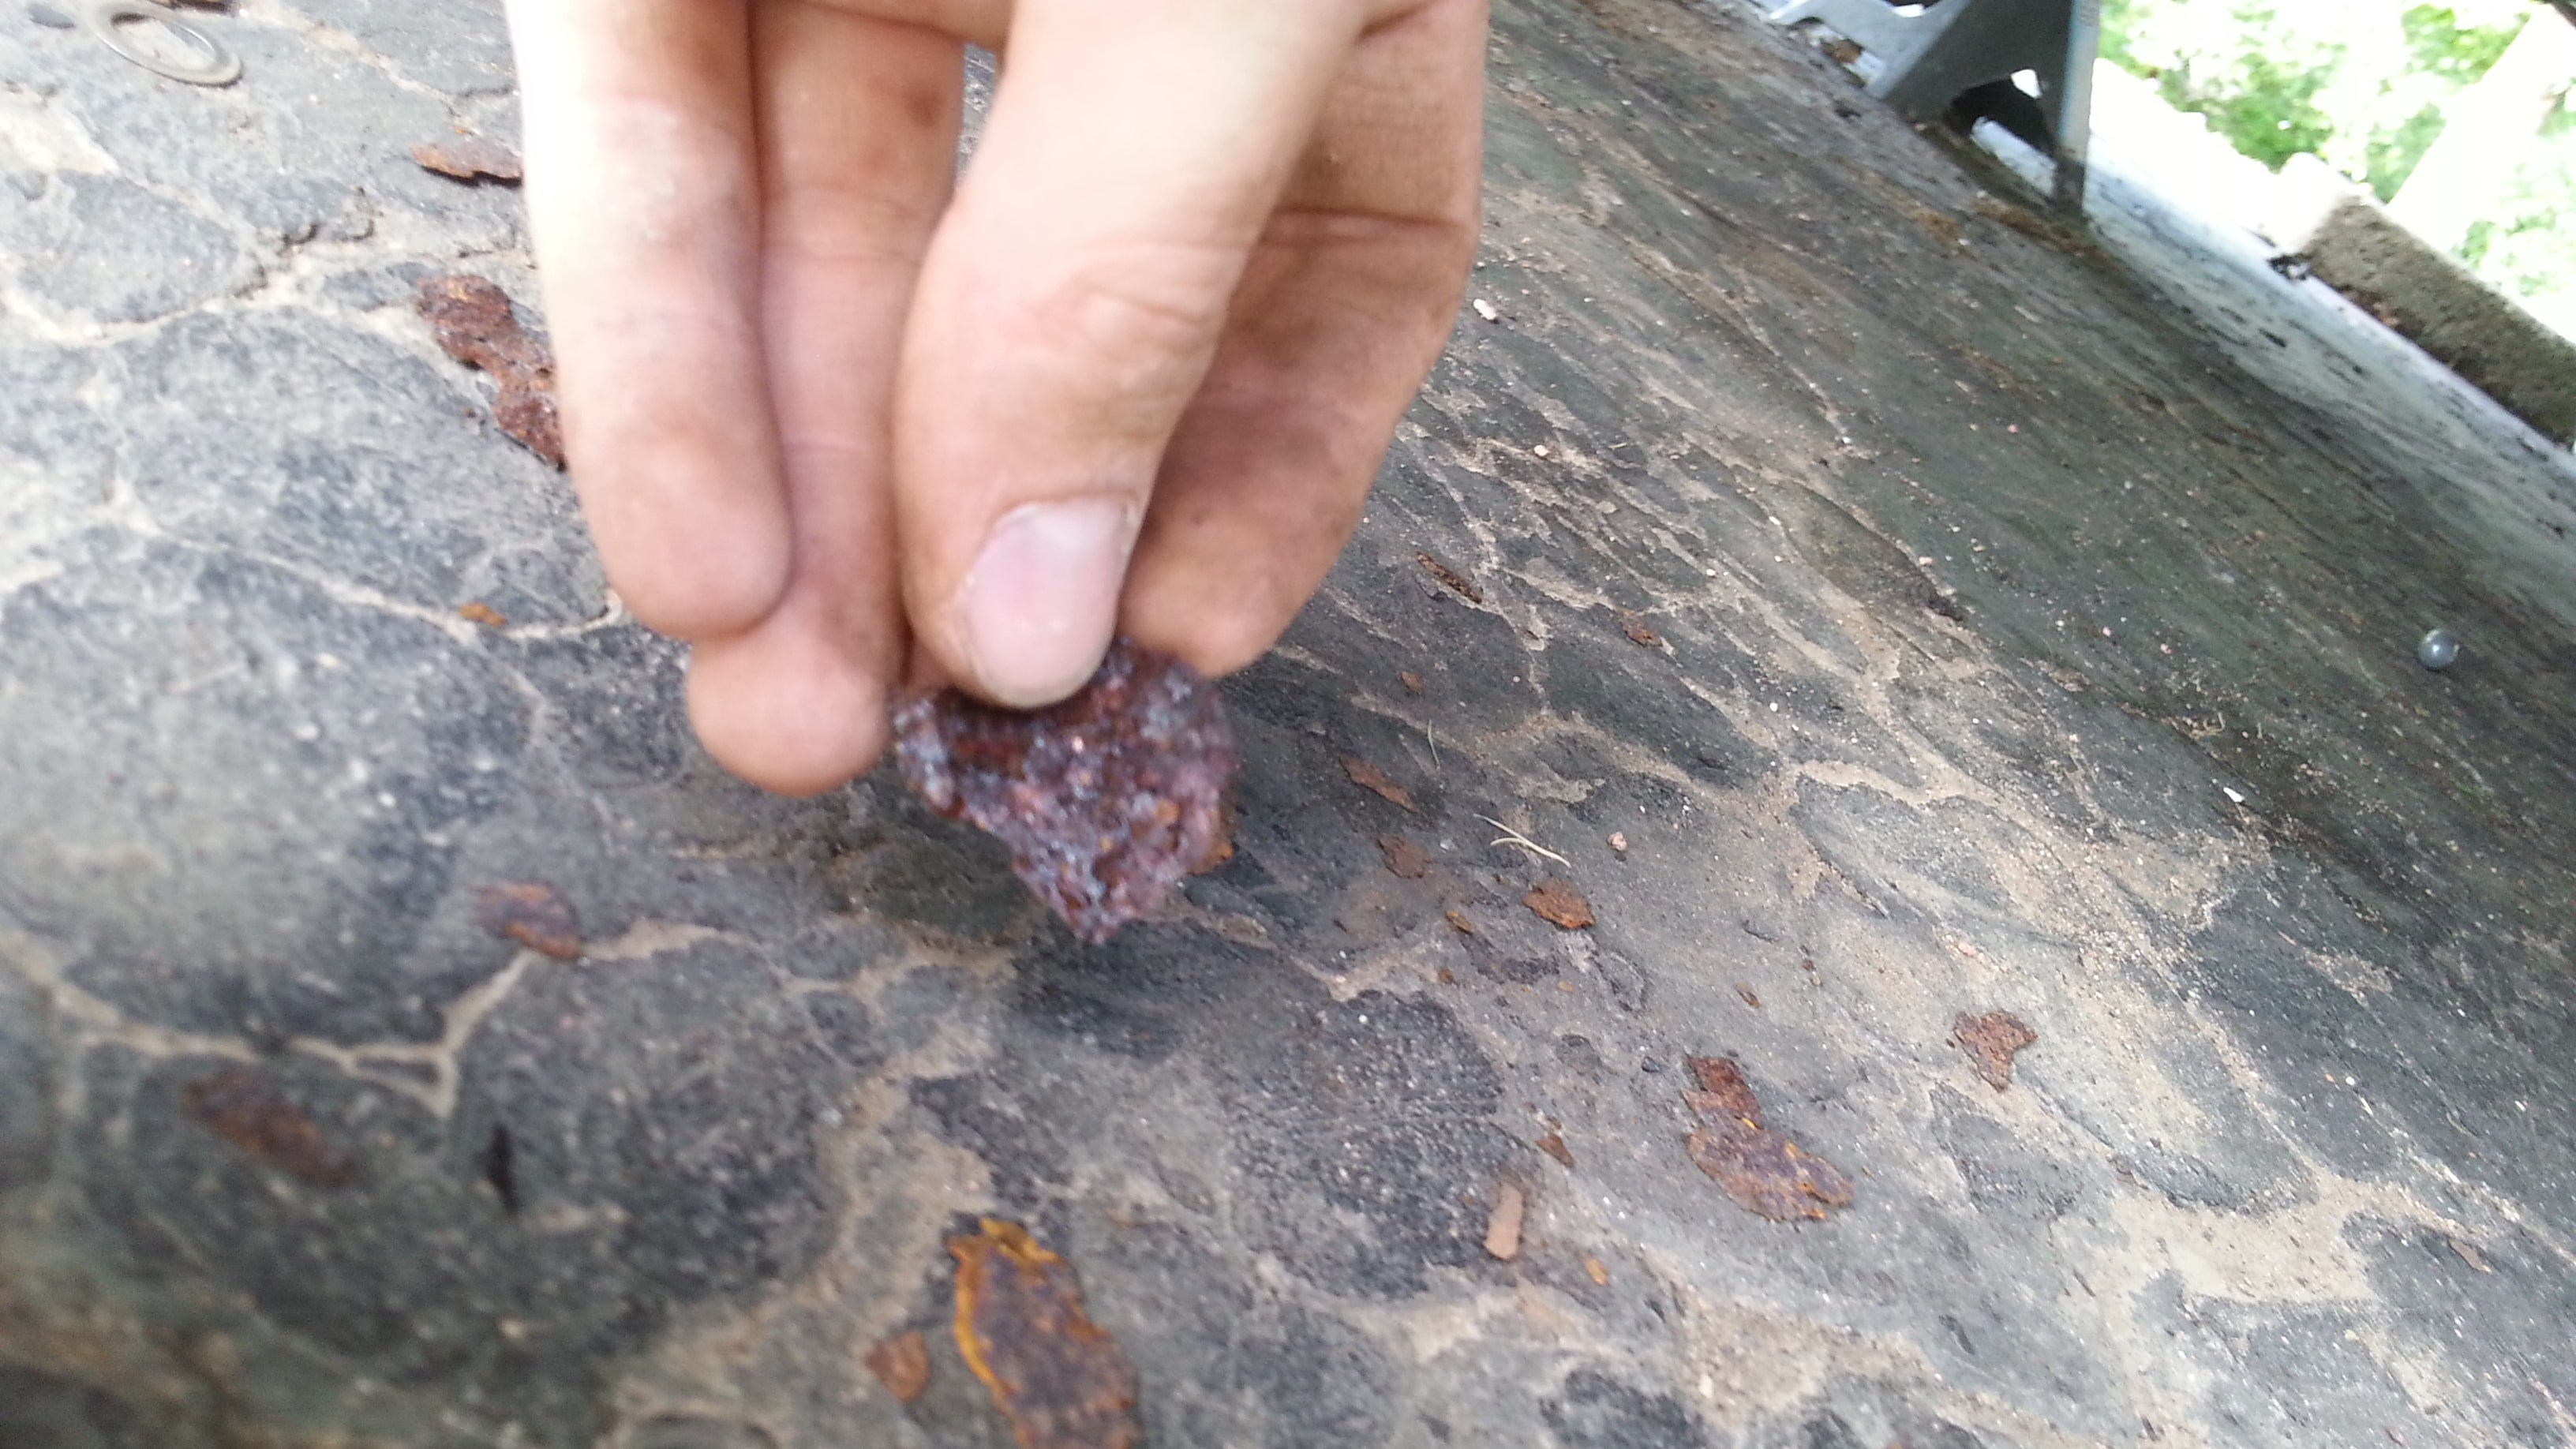

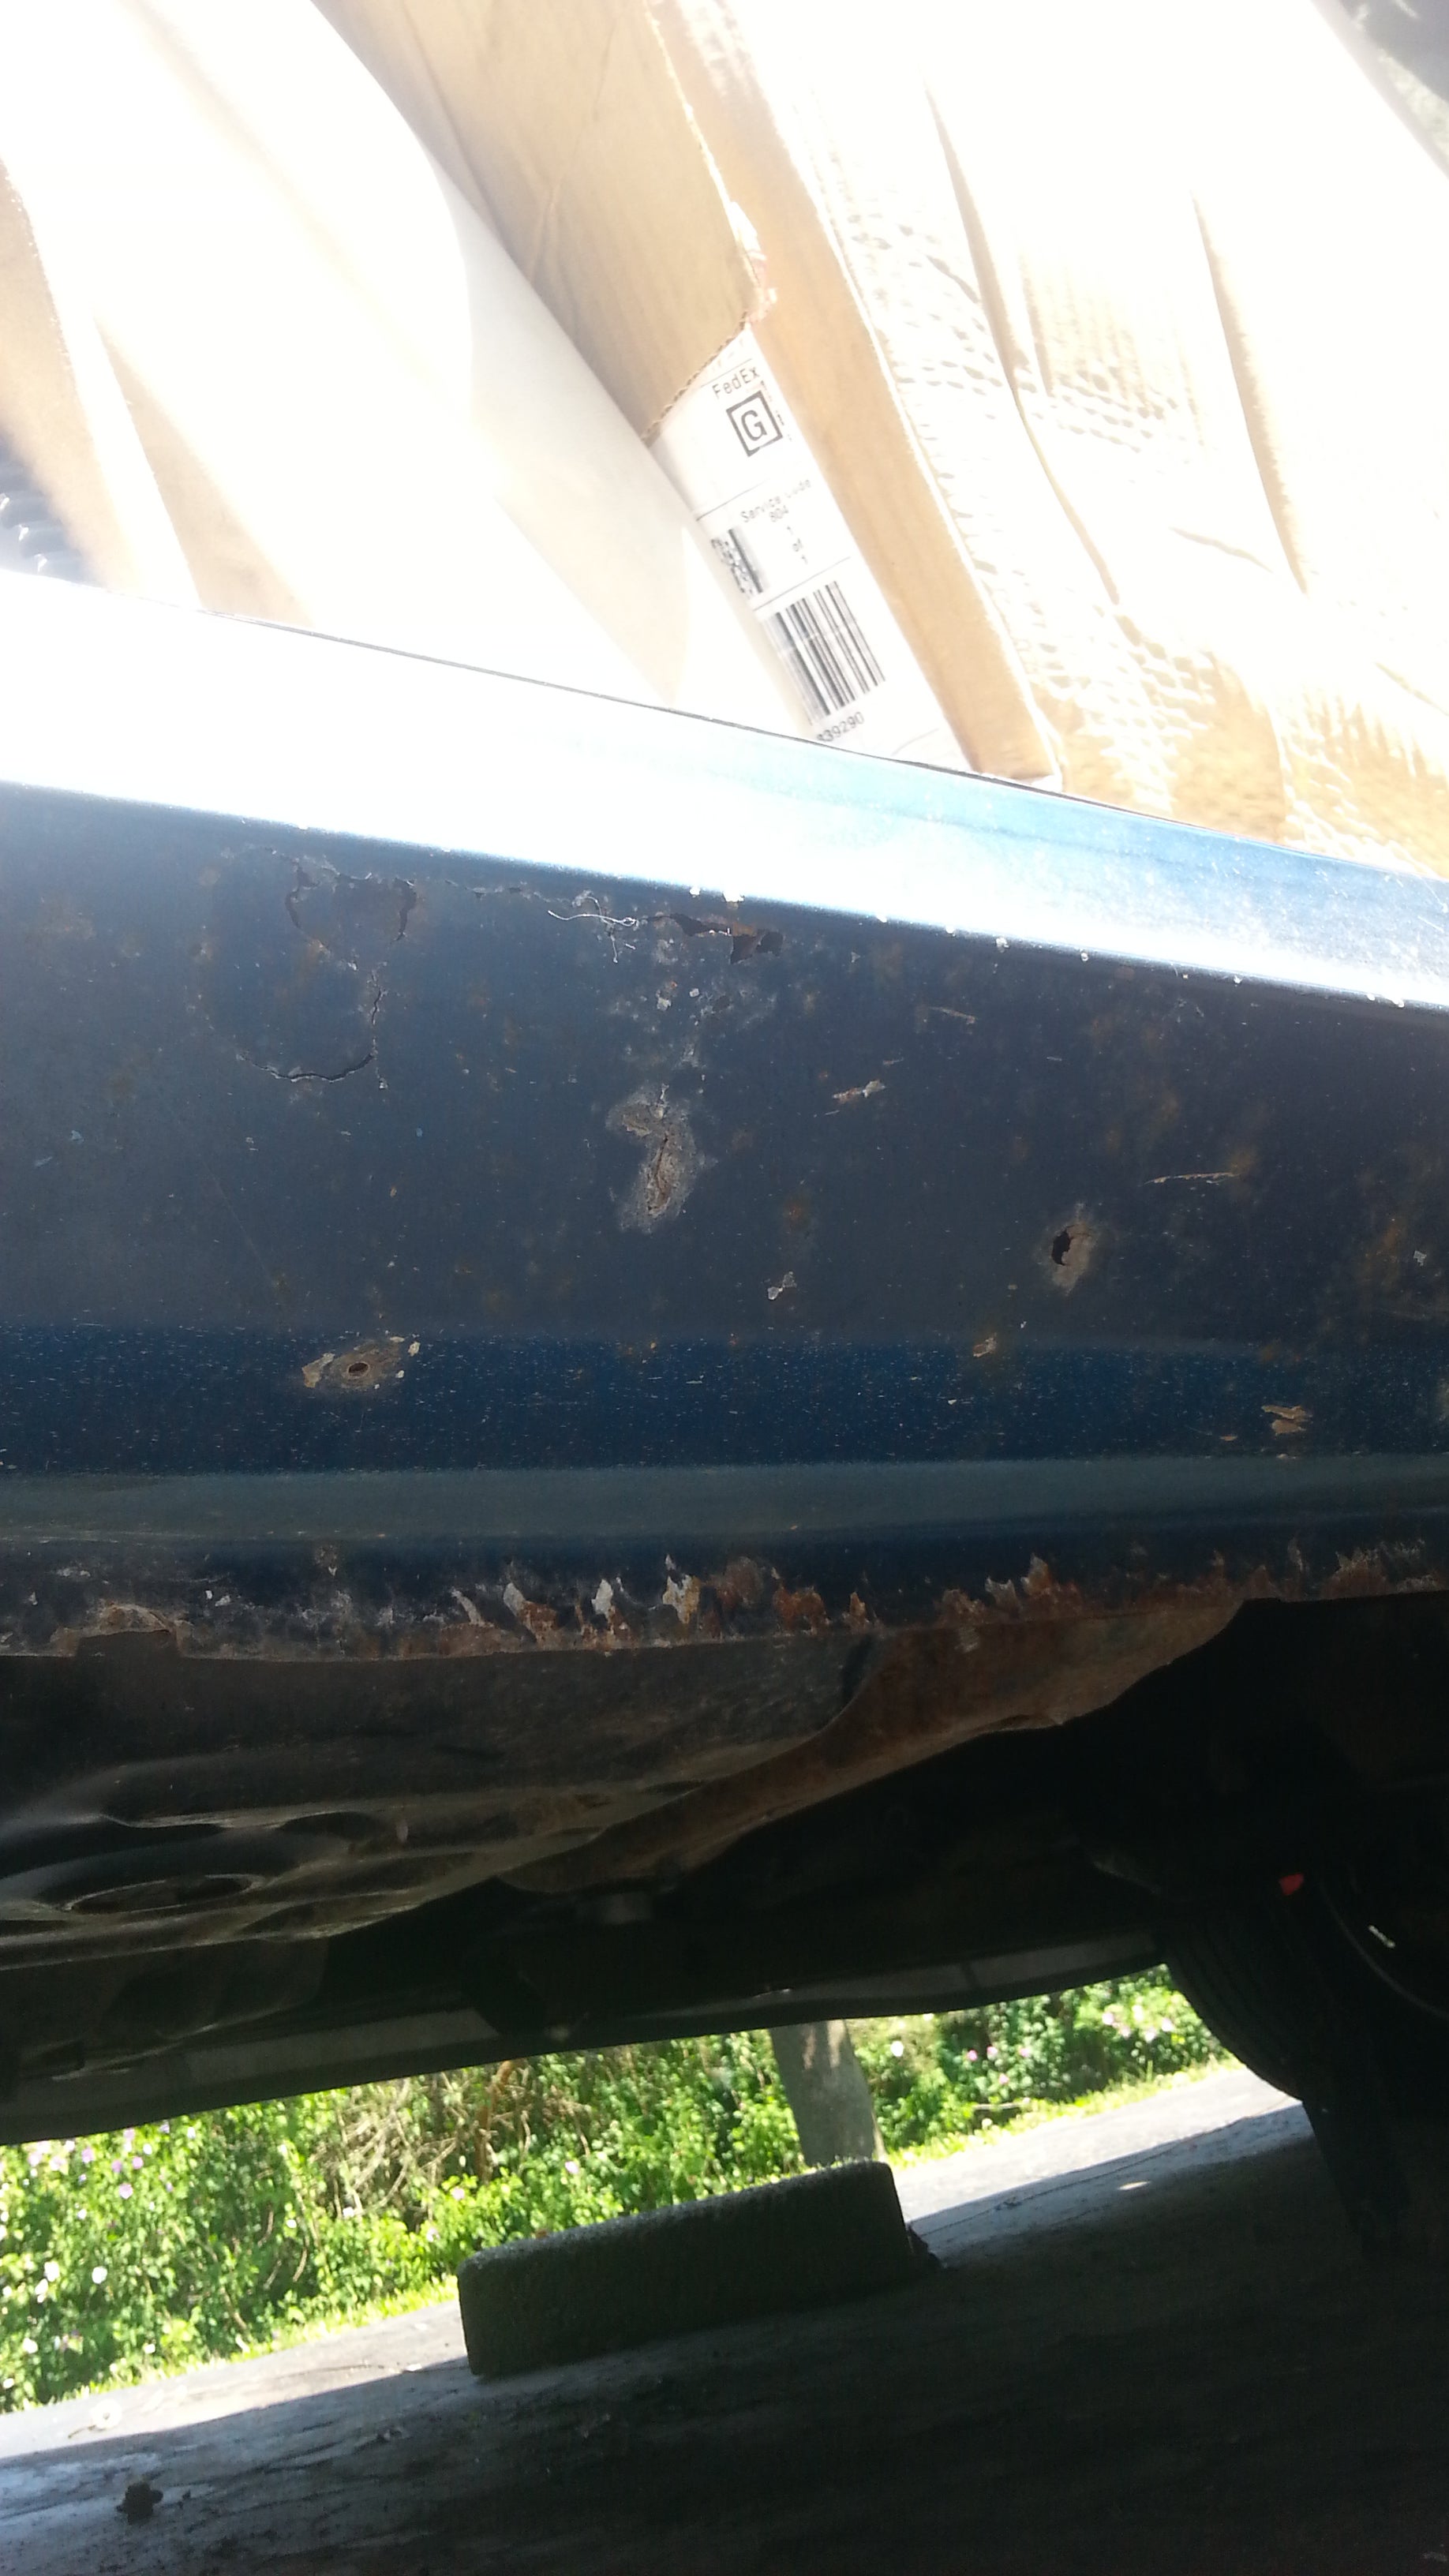
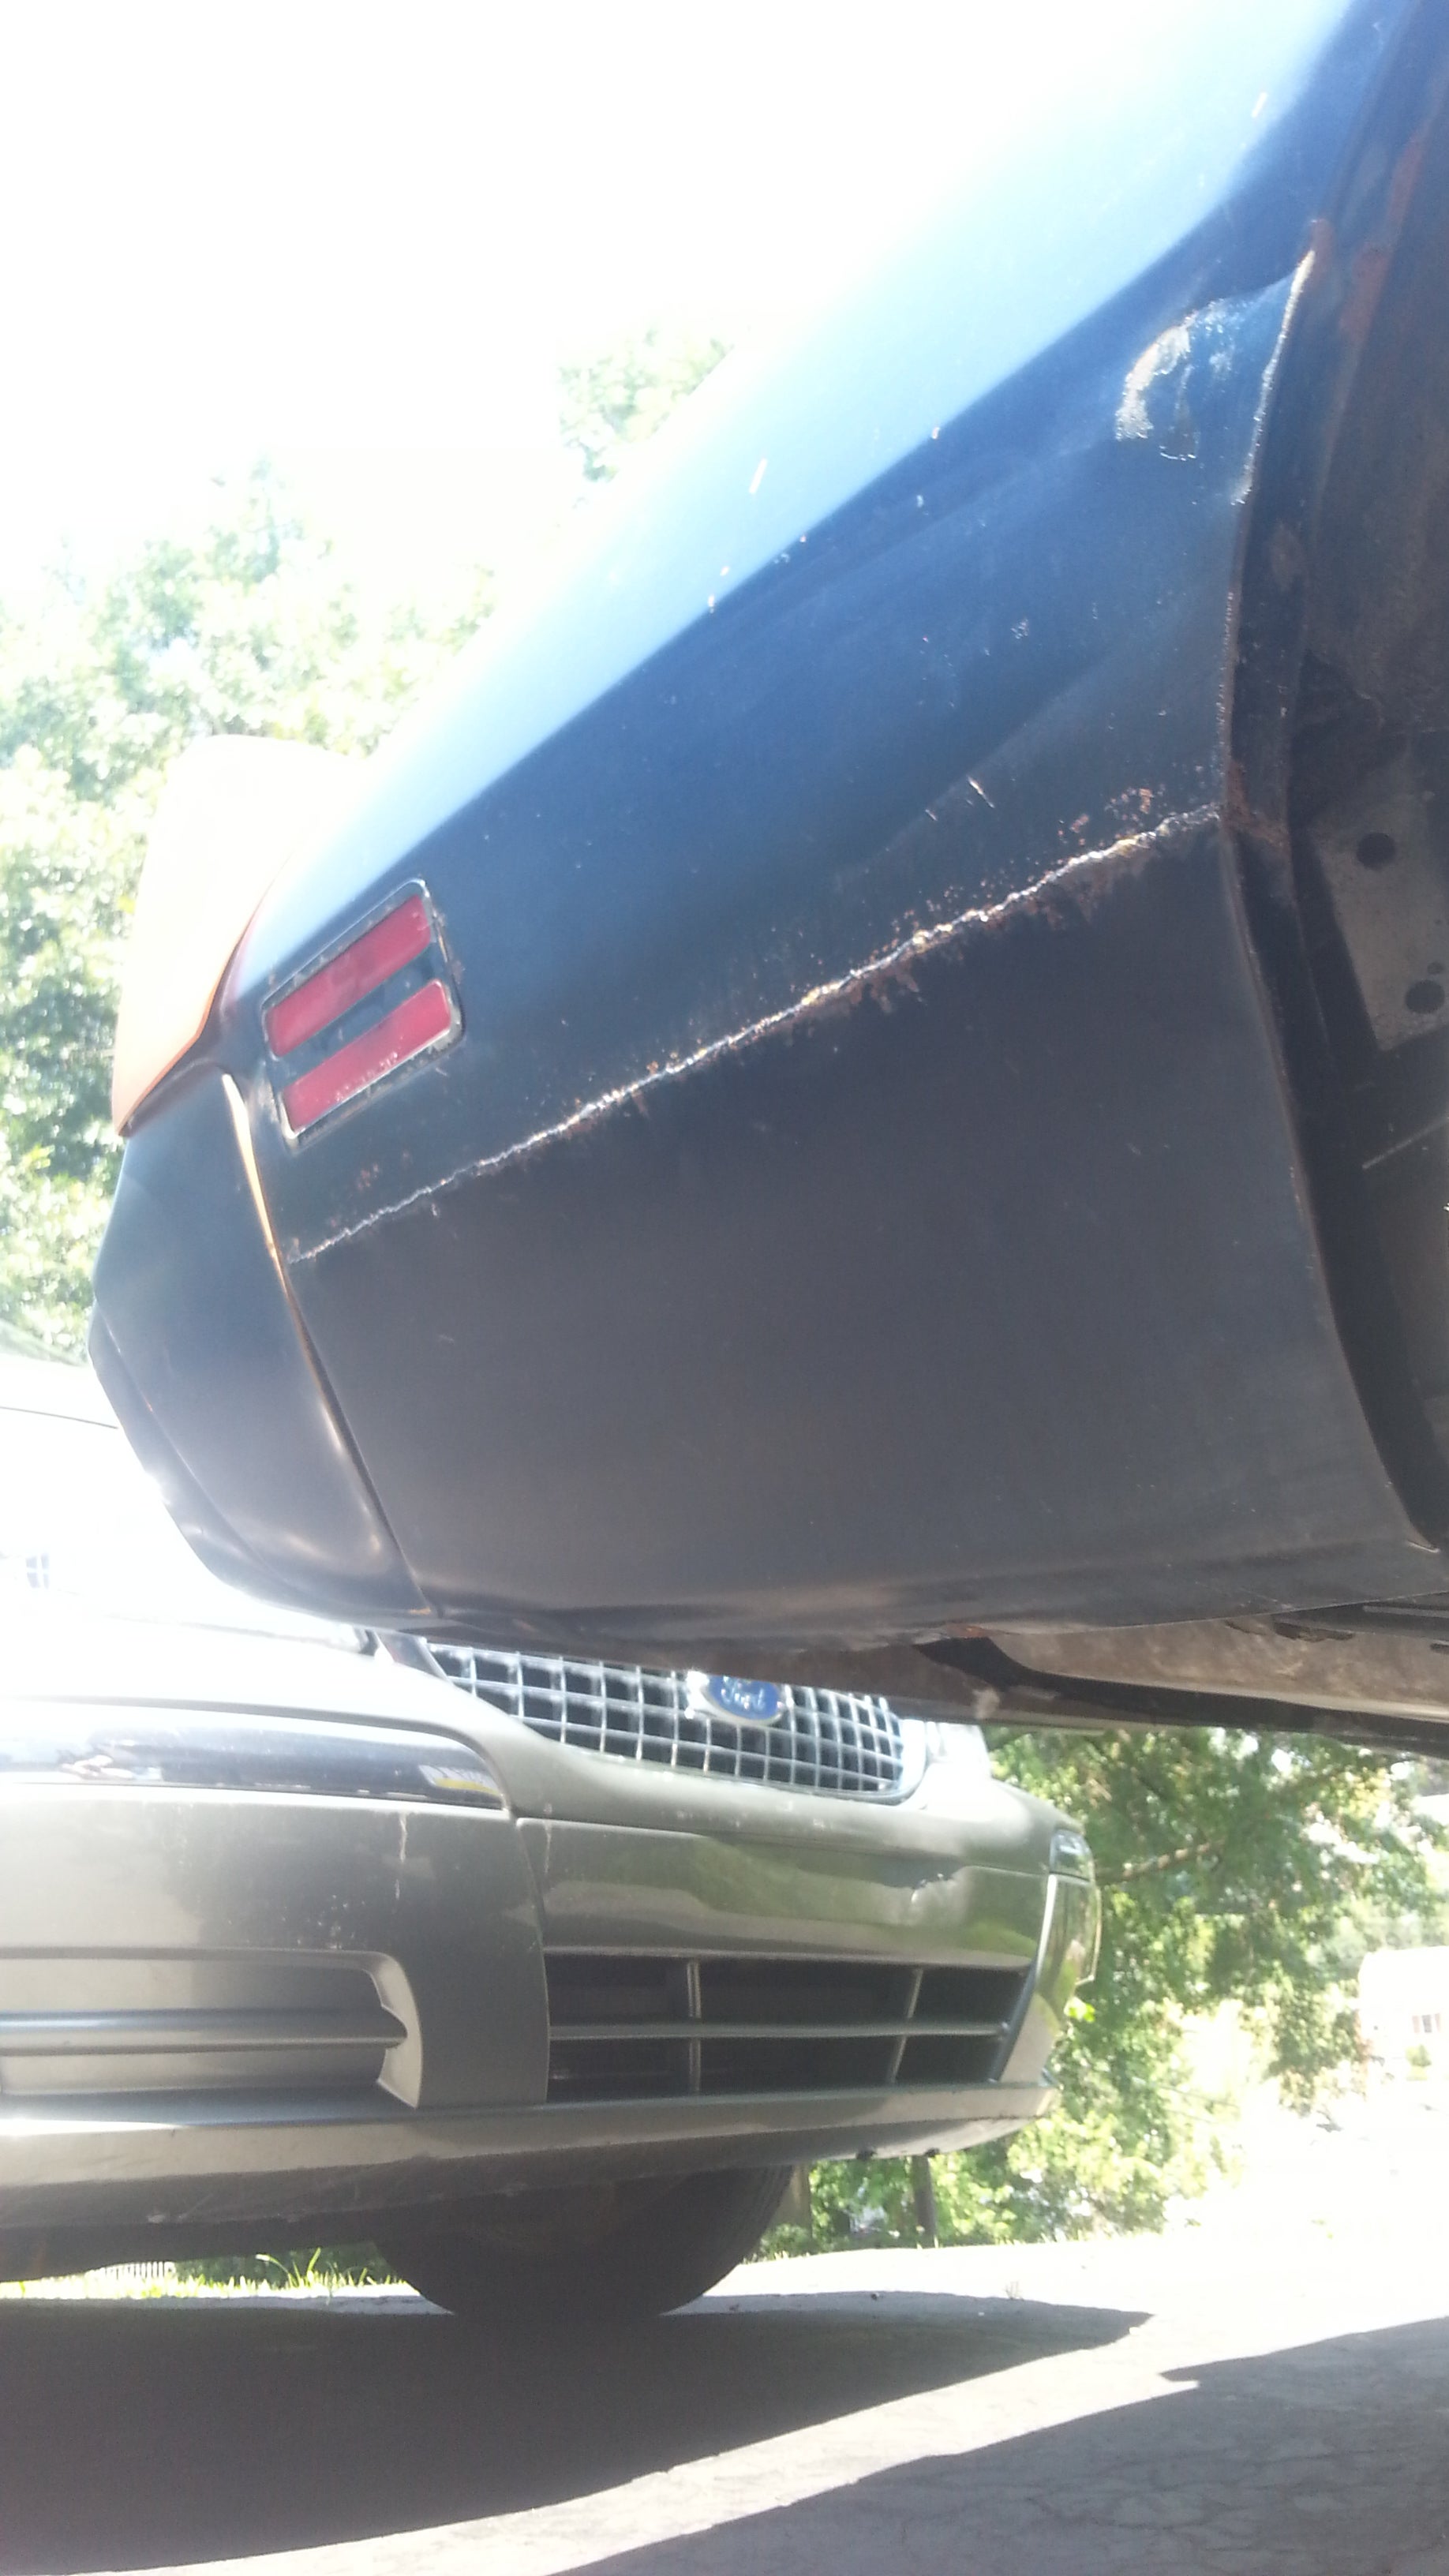
A better look at my rusty tail panel. As I said, none of this is really structural (yet) but I am pulling rust flakes out of the inside of my rear frame rails and shit. I am wondering if this car will be actually worth restoring or whether I should just keep it a rat rod.
Kinda rambling I know. Maybe you should just FIRMLY GRASP IT.
 Urambo Tauro
> My bird IS the word
Urambo Tauro
> My bird IS the word
07/18/2018 at 18:37 |
|
I’ve never used one of those single-handled tubing benders, but I think you’d get better results bracing the workpiece against a flat surface. The two-hand version, as shown in that Eastwood kit, works ok, but it’s kinda clunky and awkward if you’re trying to bend lines that are already on the car. I’ve found th e pliers to be a lot more versatile.
|
My bird IS the word
> Urambo Tauro
07/18/2018 at 18:44 |
|
The kit comes with both. however, the pliers don’t fit the 3/8s fuel line. luckily, because low pressure carb lines, I can do them in chunks since the pieces just connect via rubber hose.
I have been told I can do the entire line out of rubber but that makes me uncomfortable. If that was a good idea GM would have done it to cut costs I’m sure.
 lone_liberal
> My bird IS the word
lone_liberal
> My bird IS the word
07/18/2018 at 18:53 |
|
What I don’t understand is why GM chose to put a length of rubber line in the middle of the hard line under the car where it’s vulnerable , at least they did for my Camaro. The only thing I can think of is that it makes two shorter sections of hard line which were easier to produce, handle and install than one long hard one. So to speak.
|
My bird IS the word
> lone_liberal
07/18/2018 at 18:59 |
|
T
he spots they are
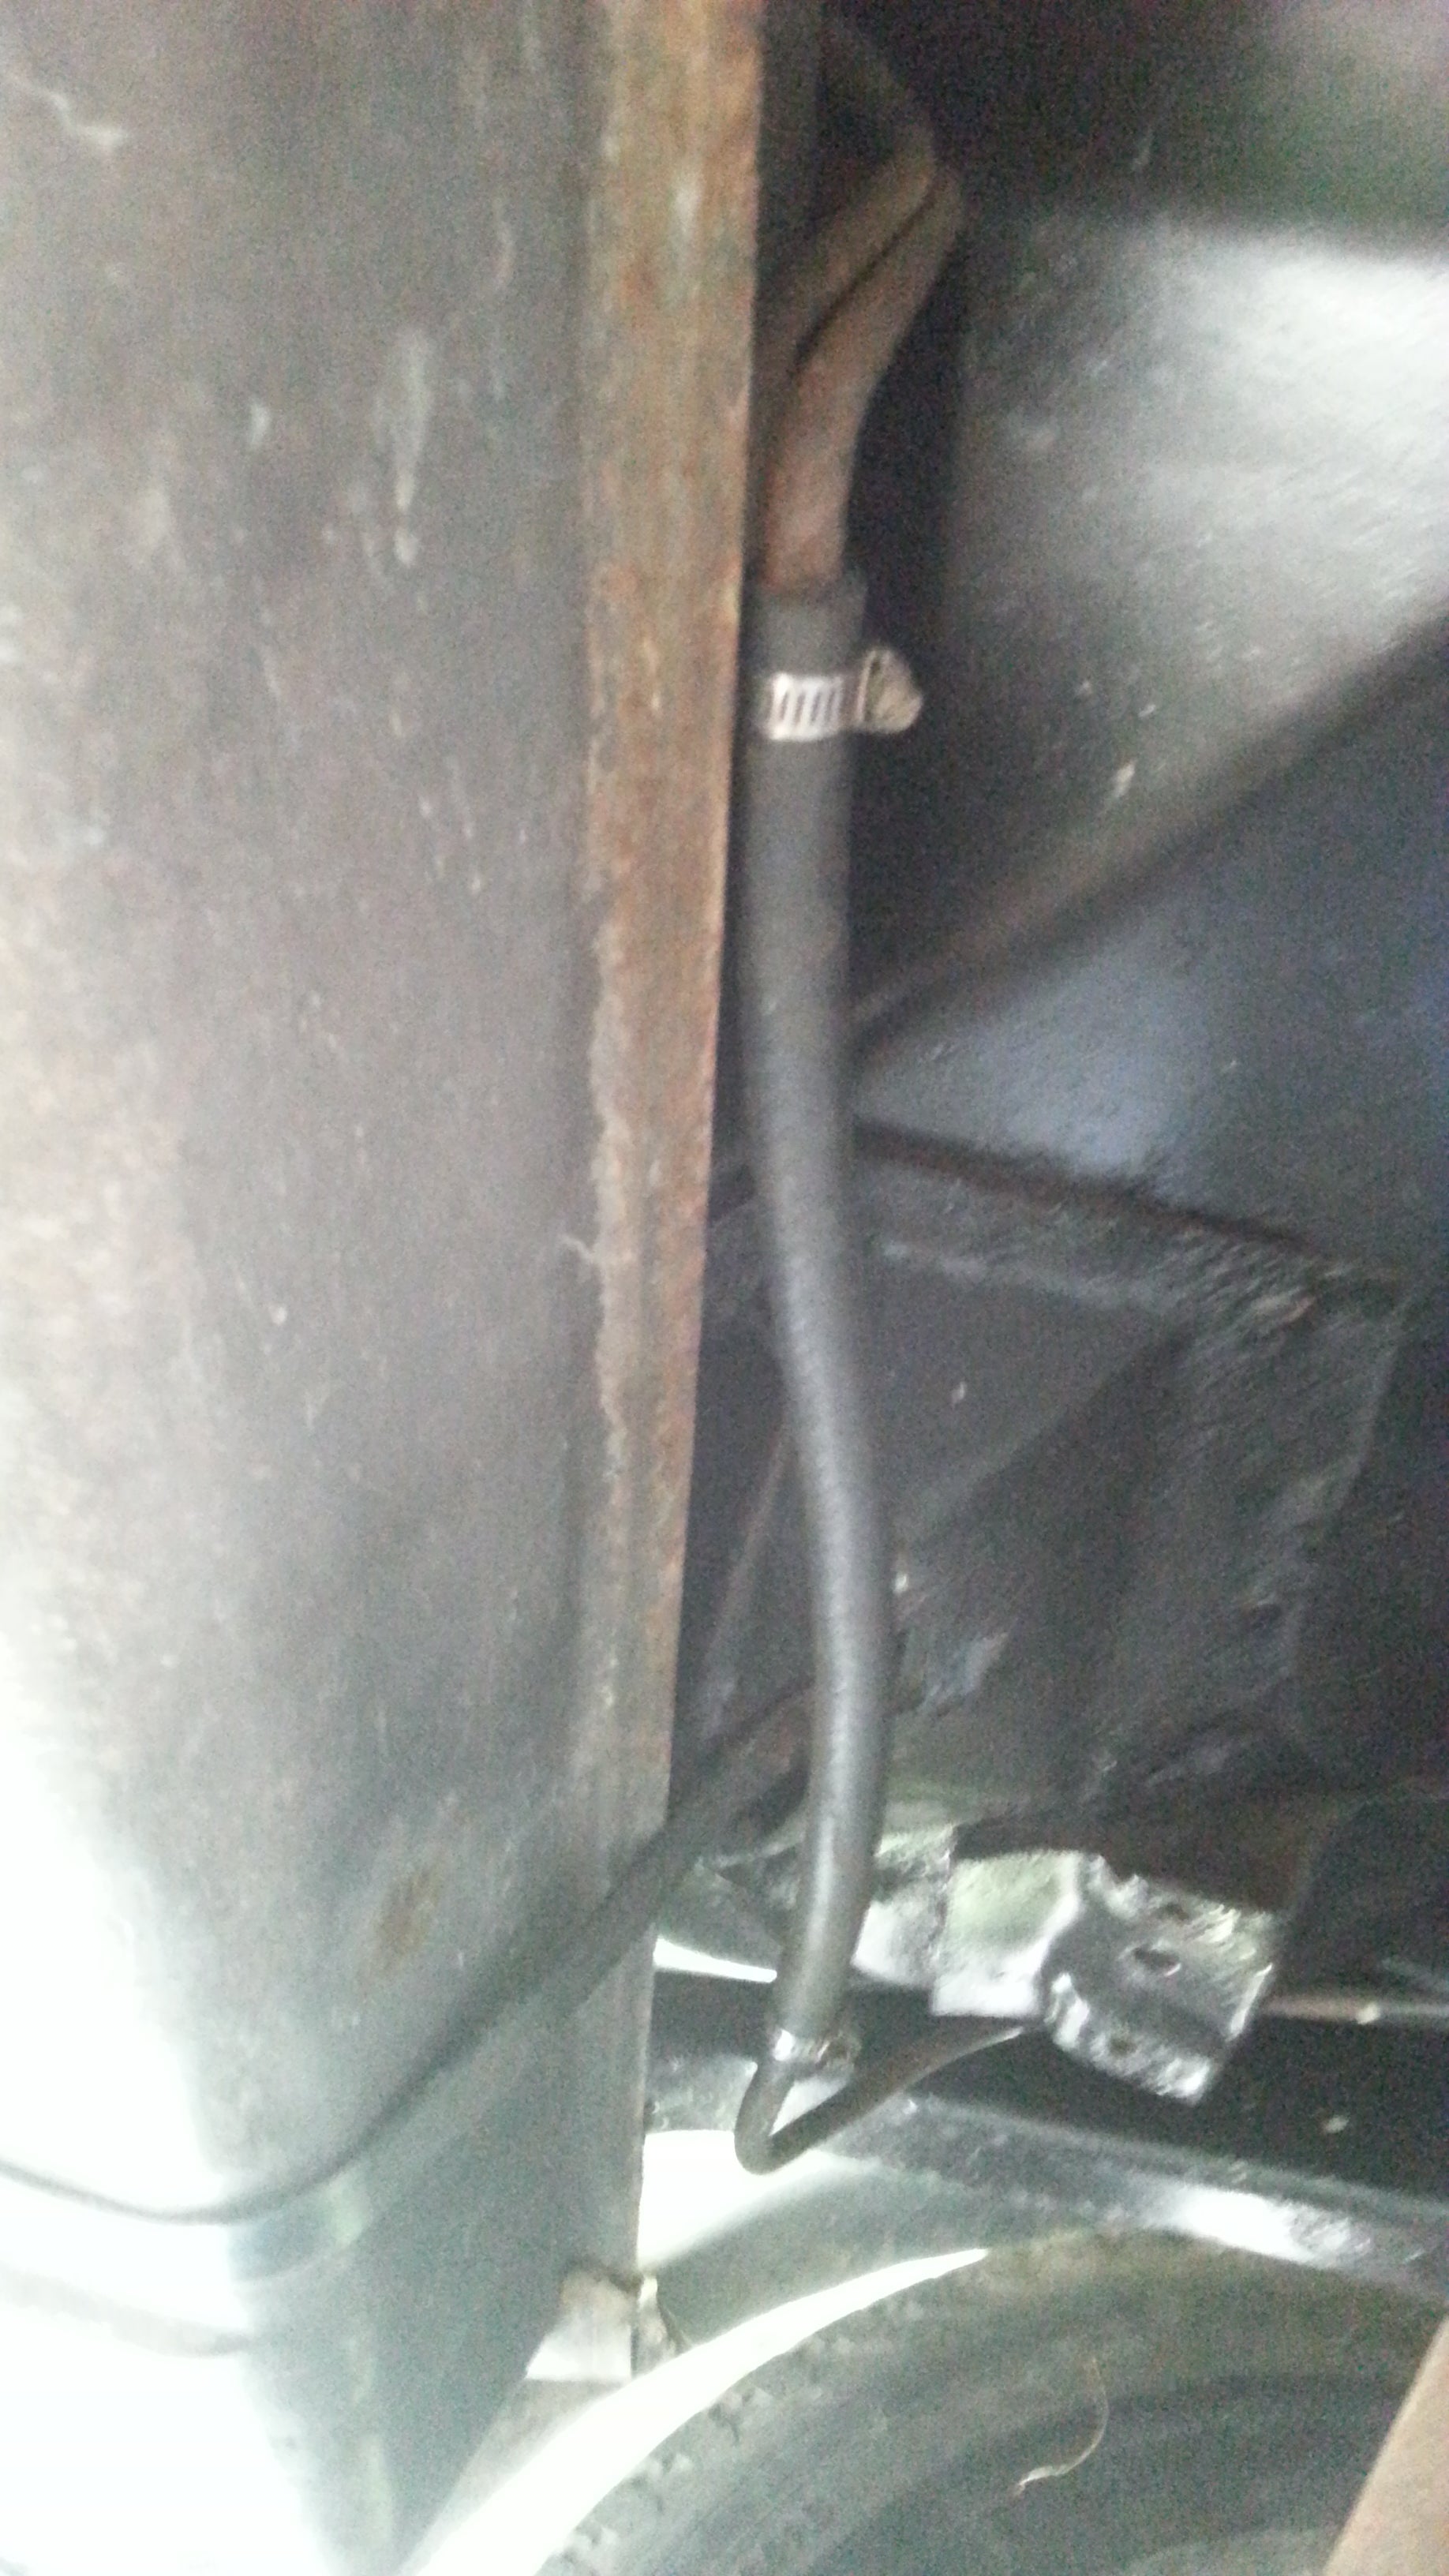
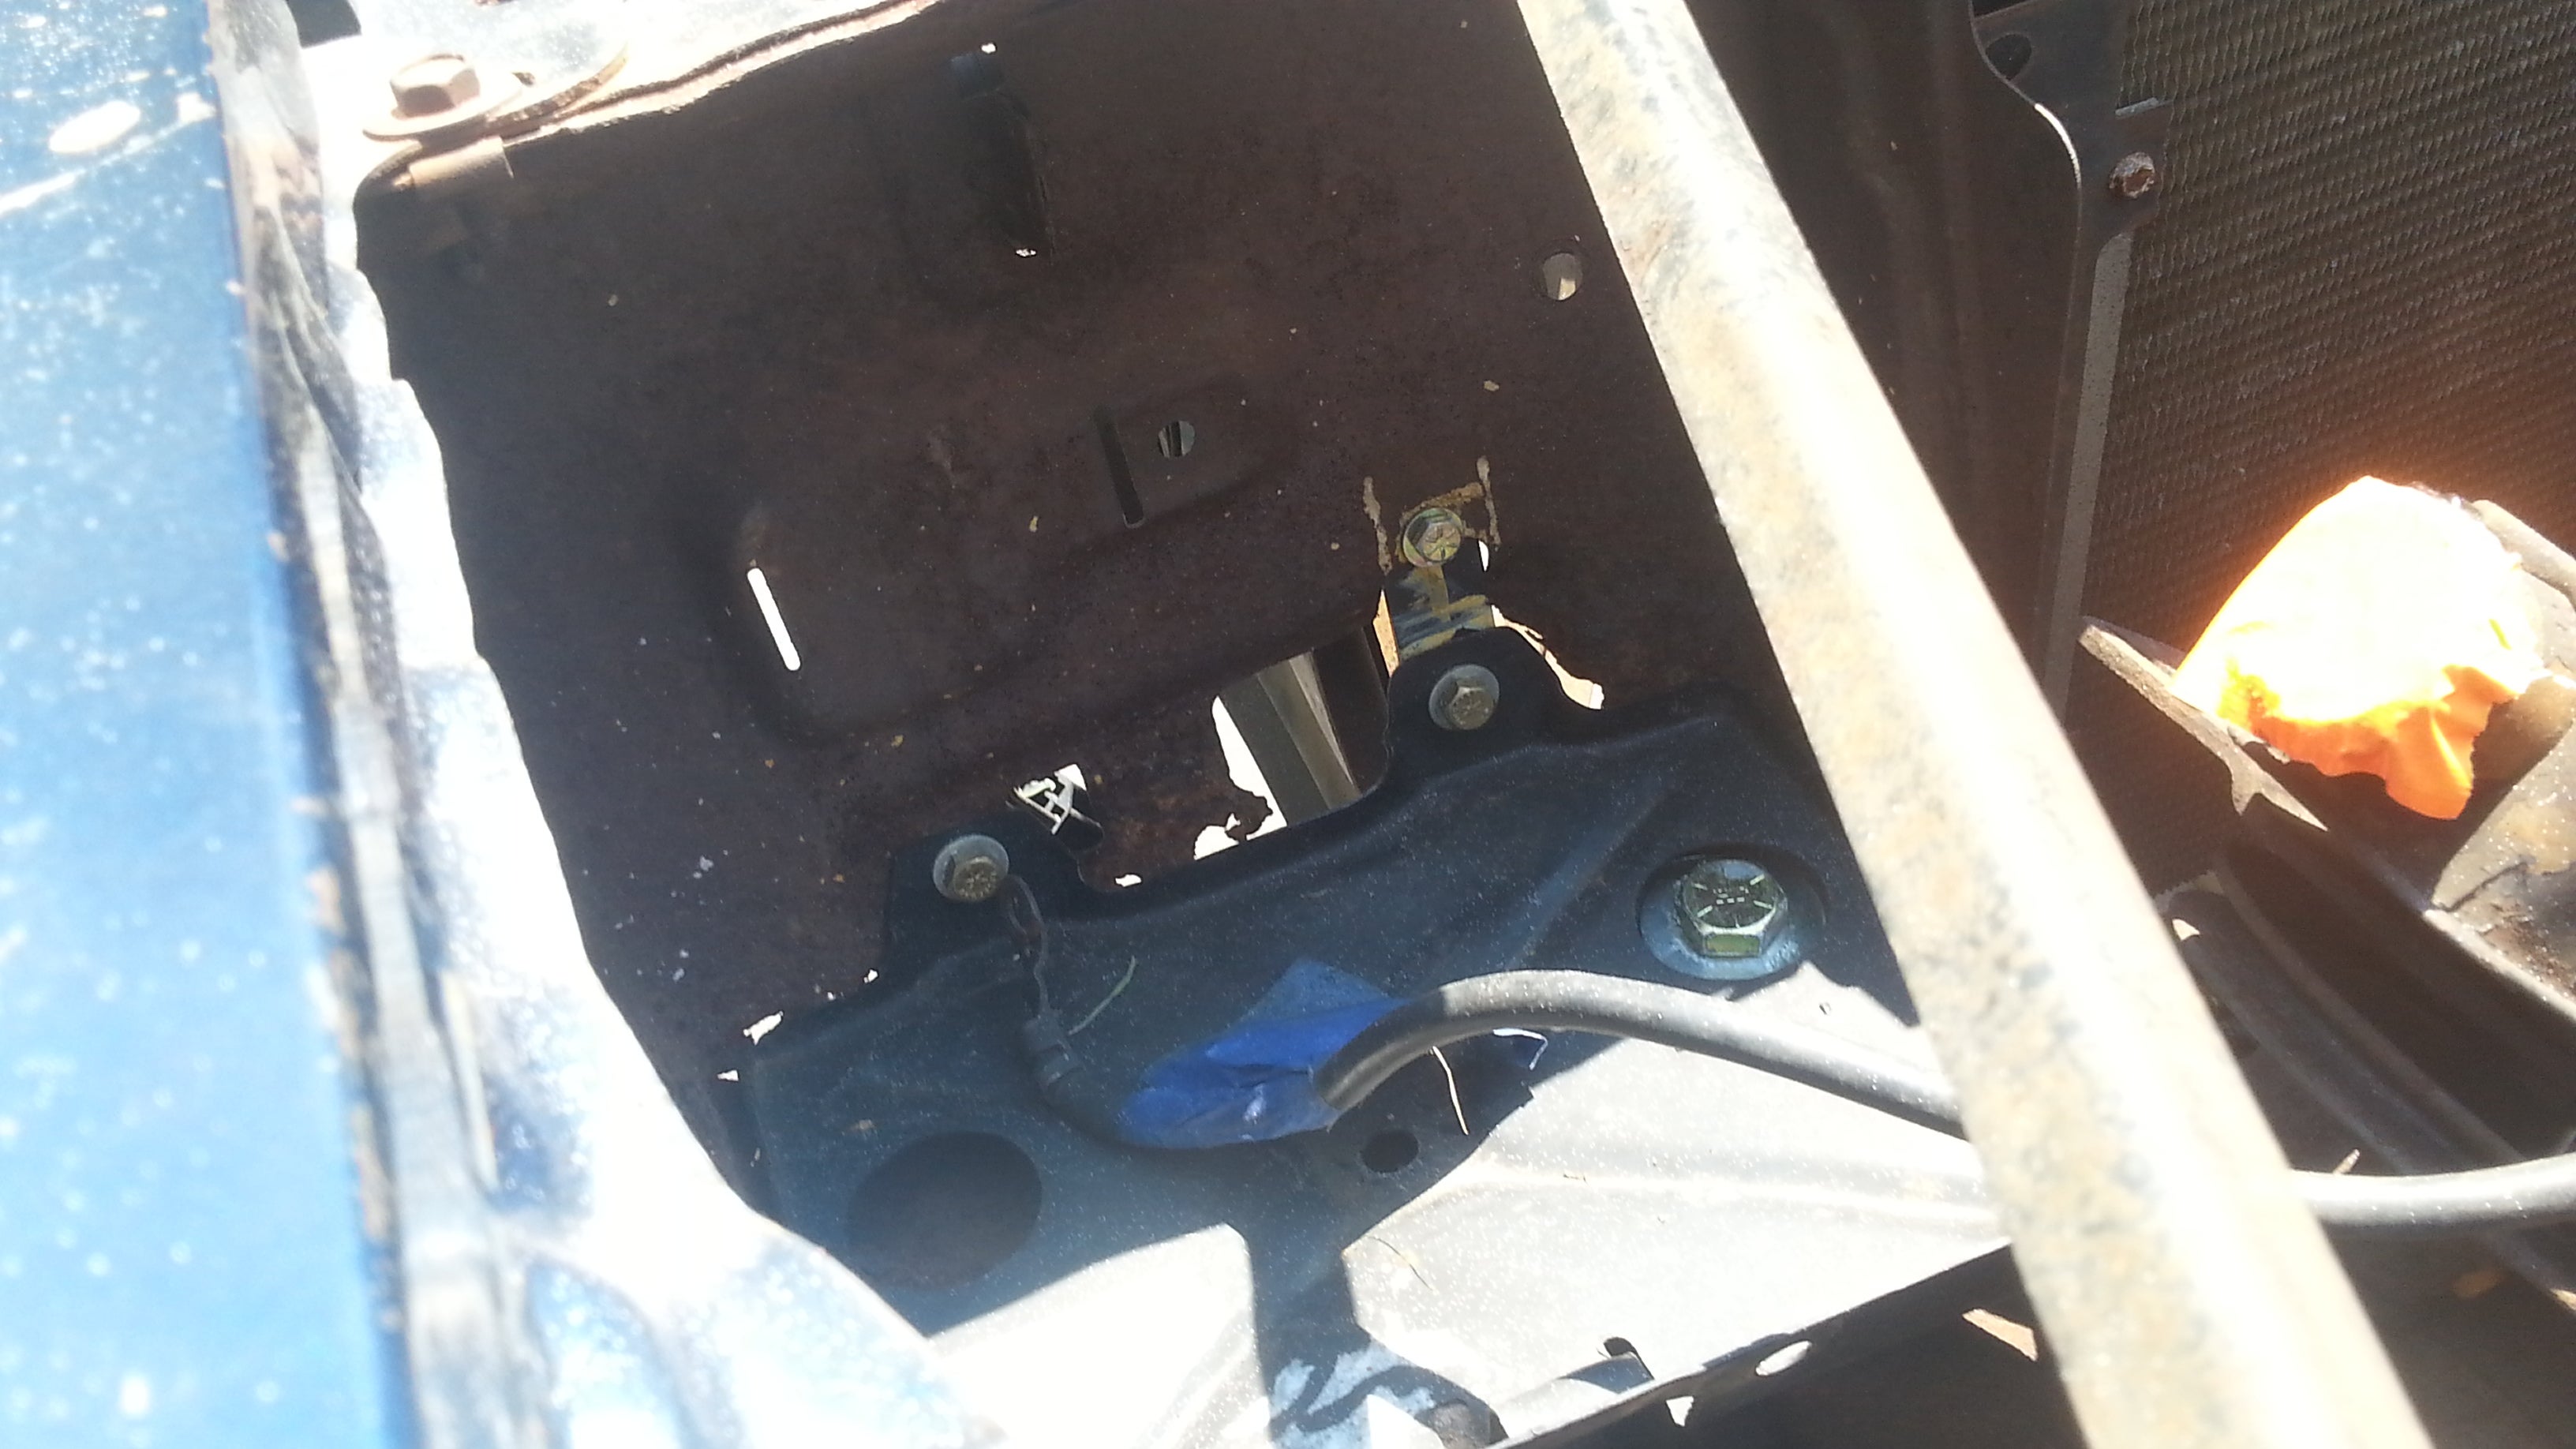
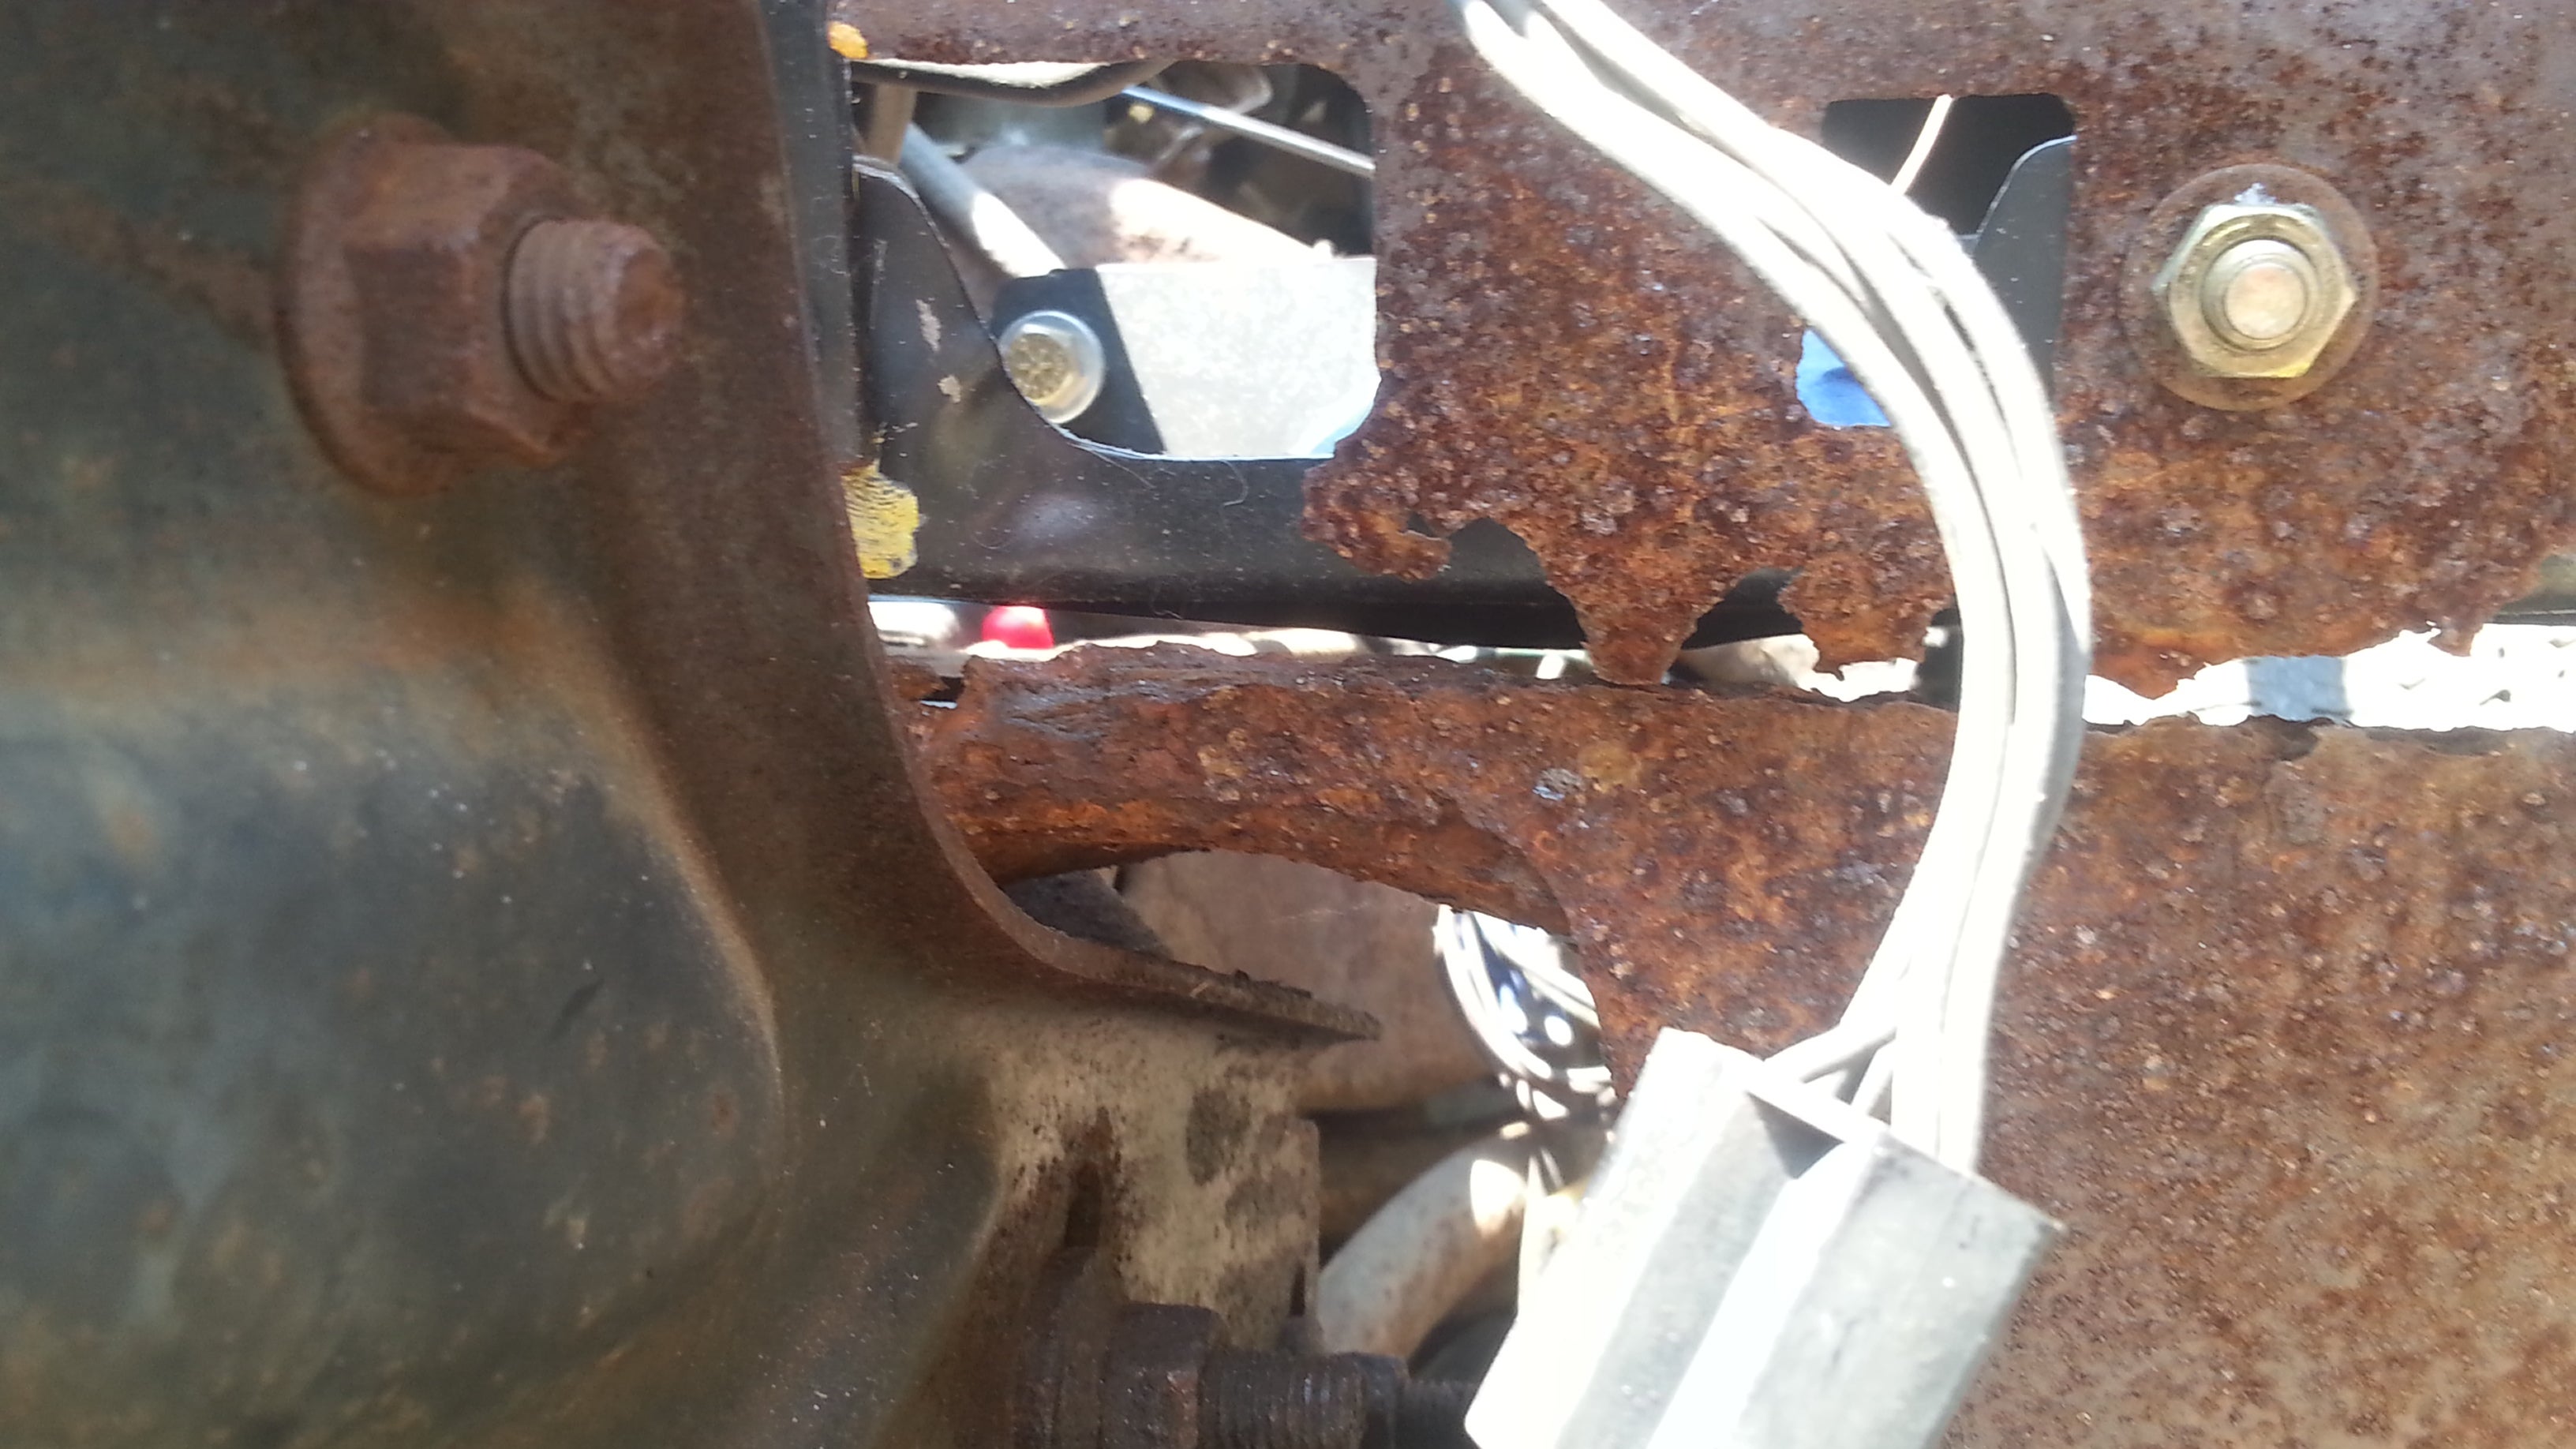
in.... kinda make sense? I assume your camaro is the same fuel line wise as my t/a. The only problem I have is the location of the hose where it comes under the front wheel well. To me, it looks like the subframe mount is going to rub the line and cause a hole. T
he spots by the gas tank seem fine to me.
|
Urambo Tauro
> My bird IS the word
07/18/2018 at 19:01 |
|
Oh, that’s right- I forgot you’re working with 3/8" there. Shoot. Does it really have to be that big?
Yeah, I don’t like using
a lot of rubber hose either. I think the
NHRA limits you to something like 12" of rubber fuel line over the entire car, just enough for a flex
ible connection or two. I think it’s a good rule of thumb for street cars too.
|
My bird IS the word
> Urambo Tauro
07/18/2018 at 19:07 |
|
I have no idea pressure wise what it needs, I am just replacing stock with stock. I’m looking at cheaper tools, but I don’t know if I am going to run into similar problems. I bet this janky tool actually would work with the smaller diameter nicopp line.
|
lone_liberal
> My bird IS the word
07/18/2018 at 19:16 |
|
I haven’t looked at mine since I replaced them a while back, using pre-bent lines because I have no skills , but I don’t remember noticing anything around the subframe mount. Everything was clamped down pretty well.
You can see something similar in this video. I just scanned it and didn’t listen to the audio so the guy might be an idiot, I don’t know, but you can see the routing.
|
My bird IS the word
> lone_liberal
07/18/2018 at 19:51 |
|
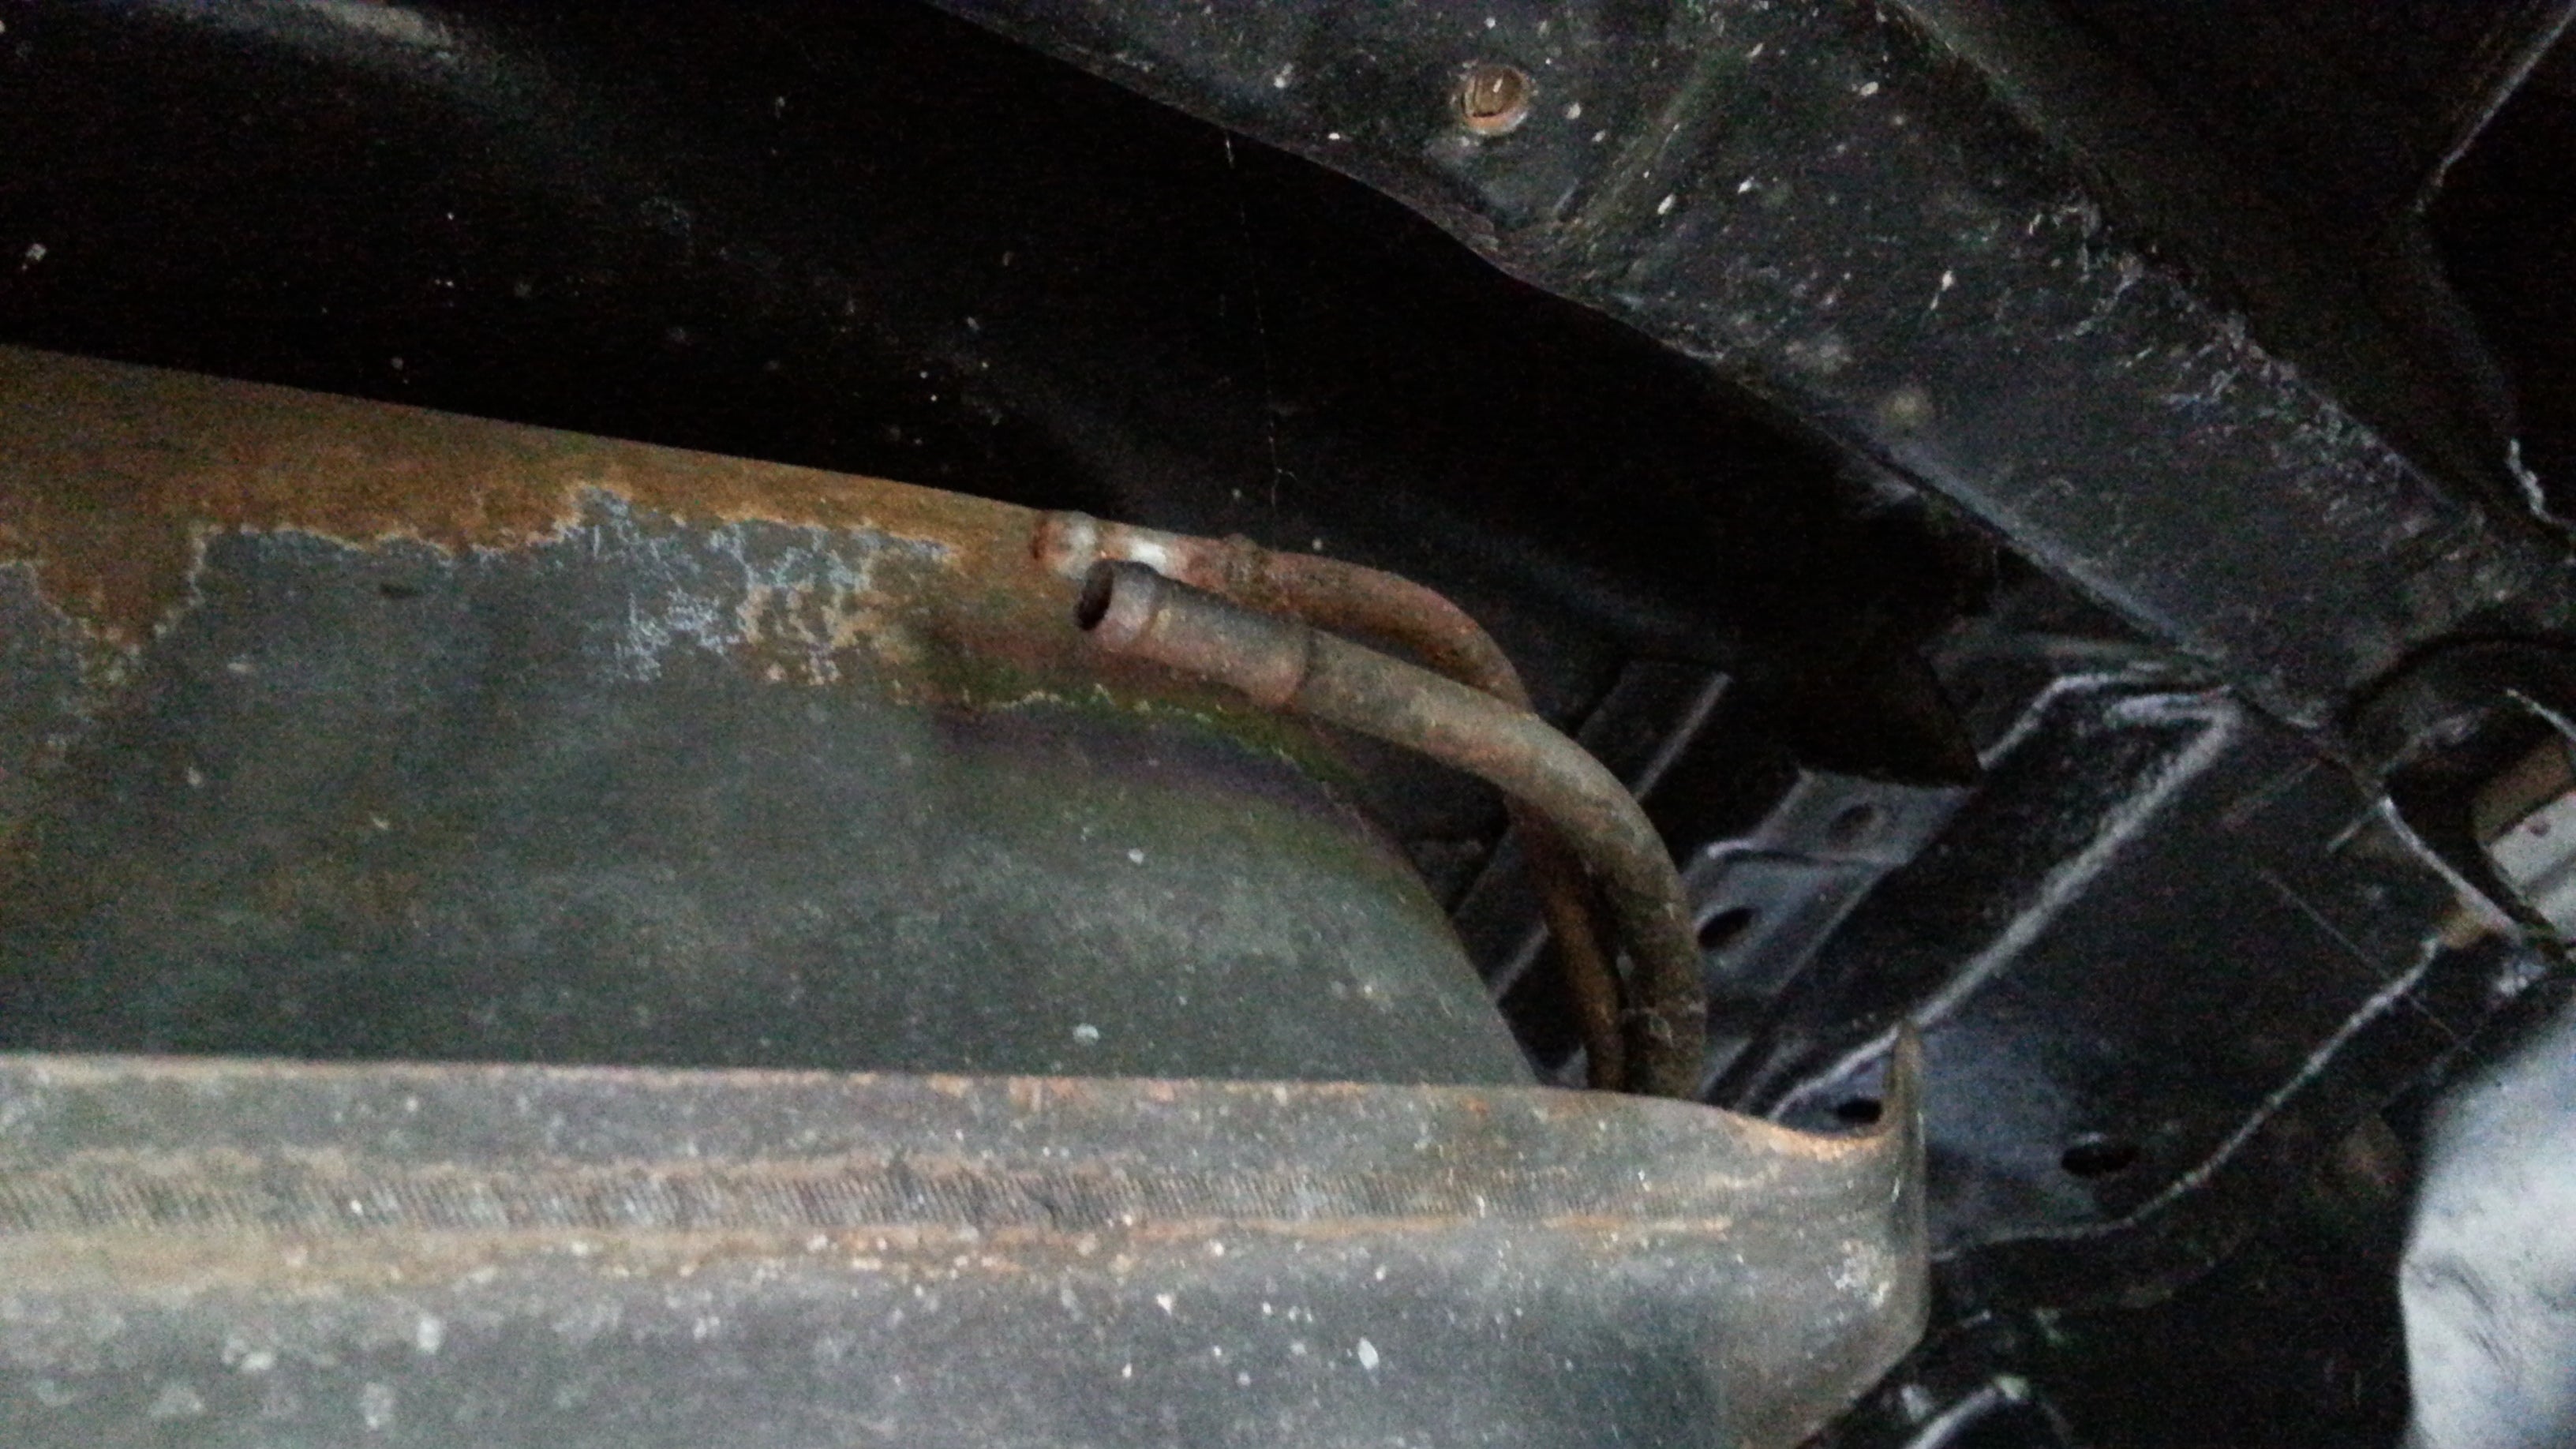
No, ours are very different then. I have no rubber whatsoever on the floor pan. the only rubber on mine
is up in that gas tank cubby, behind the front wheel wells along the frame, and the connections to the fuel pump and charcoal canister.
|
Urambo Tauro
> My bird IS the word
07/18/2018 at 19:54 |
|
Yeah, probably.
Y’know,
I would give that single-handle gizmo one more try.
If I’m reading your picture correctly, it looks like it kinked out past the main roller (unless the tool slid up
before you took th
e
pic). If you roll the tool against a flat surface, with the tubing in-between, I think you might have a better chance.
|
lone_liberal
> My bird IS the word
07/18/2018 at 19:57 |
|
I see. Yeah, mine has rubber from the tank to the hard line, then a section of rubber under the floor pan, then hard line again to the fuel pump. I’m not sure if the difference is Chevy/Pontiac or non-emissions/emissions. Mine does (or at least did) have an evaporative canister but it’s on the driver’s side with the hard line coming out just in front of the firewall and then rubber from there to the canister.
|
My bird IS the word
> lone_liberal
07/18/2018 at 20:02 |
|
As far as I can tell, there is a ton of difference in routing. however, construction remains consistant.
That rubber middle section would concern me as well. that is exactly where you don’t want it. I guess they figured the trade off was worth it when they switched over, my old line didn’t have much rub damage but it may not be original.
|
My bird IS the word
> Urambo Tauro
07/18/2018 at 20:06 |
|
Thats what I did. I was using the top of a chest-height wall as a workbench.
I think I might buy the eastwood tool, beacause fuck it right? This shit isn’t getting done no matter how much money I spend.
I watched a barn find hunter the other day
where the guy talked about pulling a 60s car out of the junkyard and having it running within 4 months of weekends, and then I realized that I had been had.
 pip bip - choose Corrour
> My bird IS the word
pip bip - choose Corrour
> My bird IS the word
07/19/2018 at 06:10 |
|
rat rod
 crowmolly
> My bird IS the word
crowmolly
> My bird IS the word
07/19/2018 at 14:12 |
|
The Summit tubing bender works ok. I think it’s only a few bucks.
Looks like you’ll need a new tail panel. Not a HUGE deal. How are the quarters, roof, firewall, and hood? Frame rails rusted through under the rear seats? That’s what matters.
|
My bird IS the word
> crowmolly
07/19/2018 at 19:53 |
|
My one rear quarter and rocker are borked, frame, firewall and roof are good. Gonna need a new radiator shroud, door bottoms, front fiberglass. Hoods ok but the glue that holds the frame let go.
I just bought the eastwood set. Fuck it. Figure ill just throw tools at it.
|
crowmolly
> My bird IS the word
07/20/2018 at 09:46 |
|
Well, define “borked”.
Is it a lower quarter that can be patched, or will it be a full quarter? Huge work difference.
Same with the rocker. Can it be patched and skimmed with filler? Or are you replacing an entire outer rocker?
|
My bird IS the word
> crowmolly
07/20/2018 at 12:25 |
|
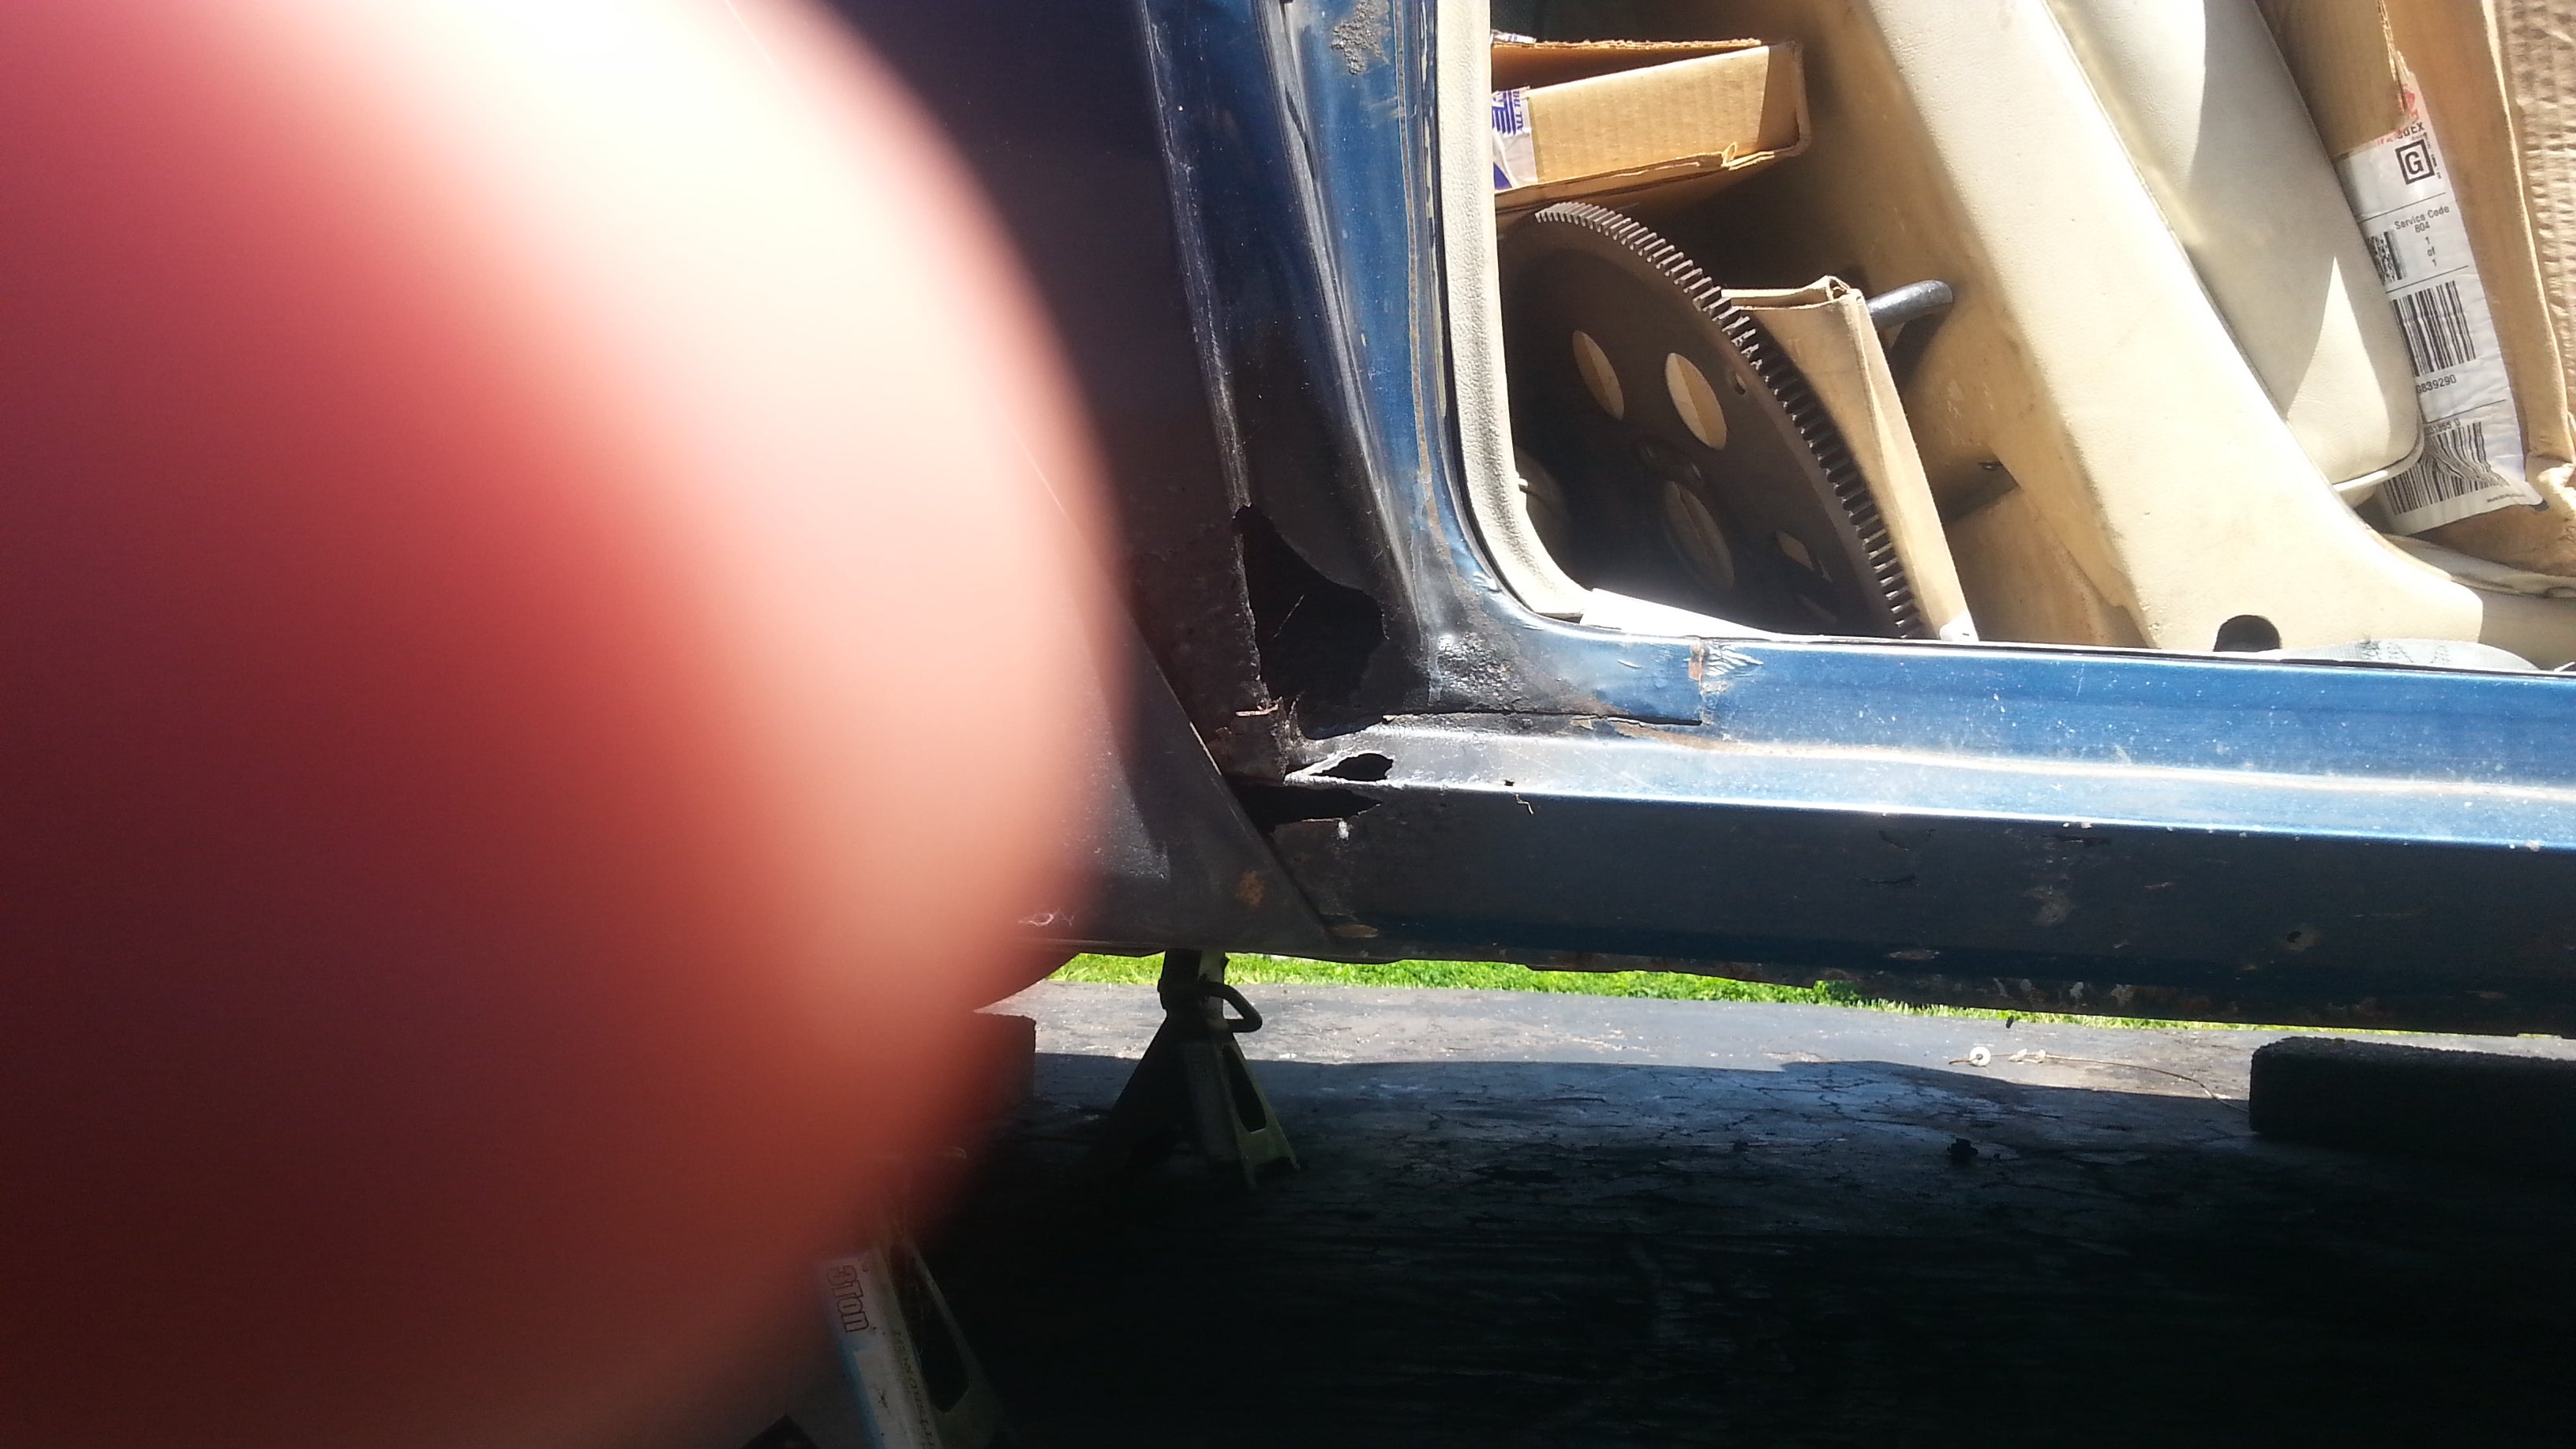
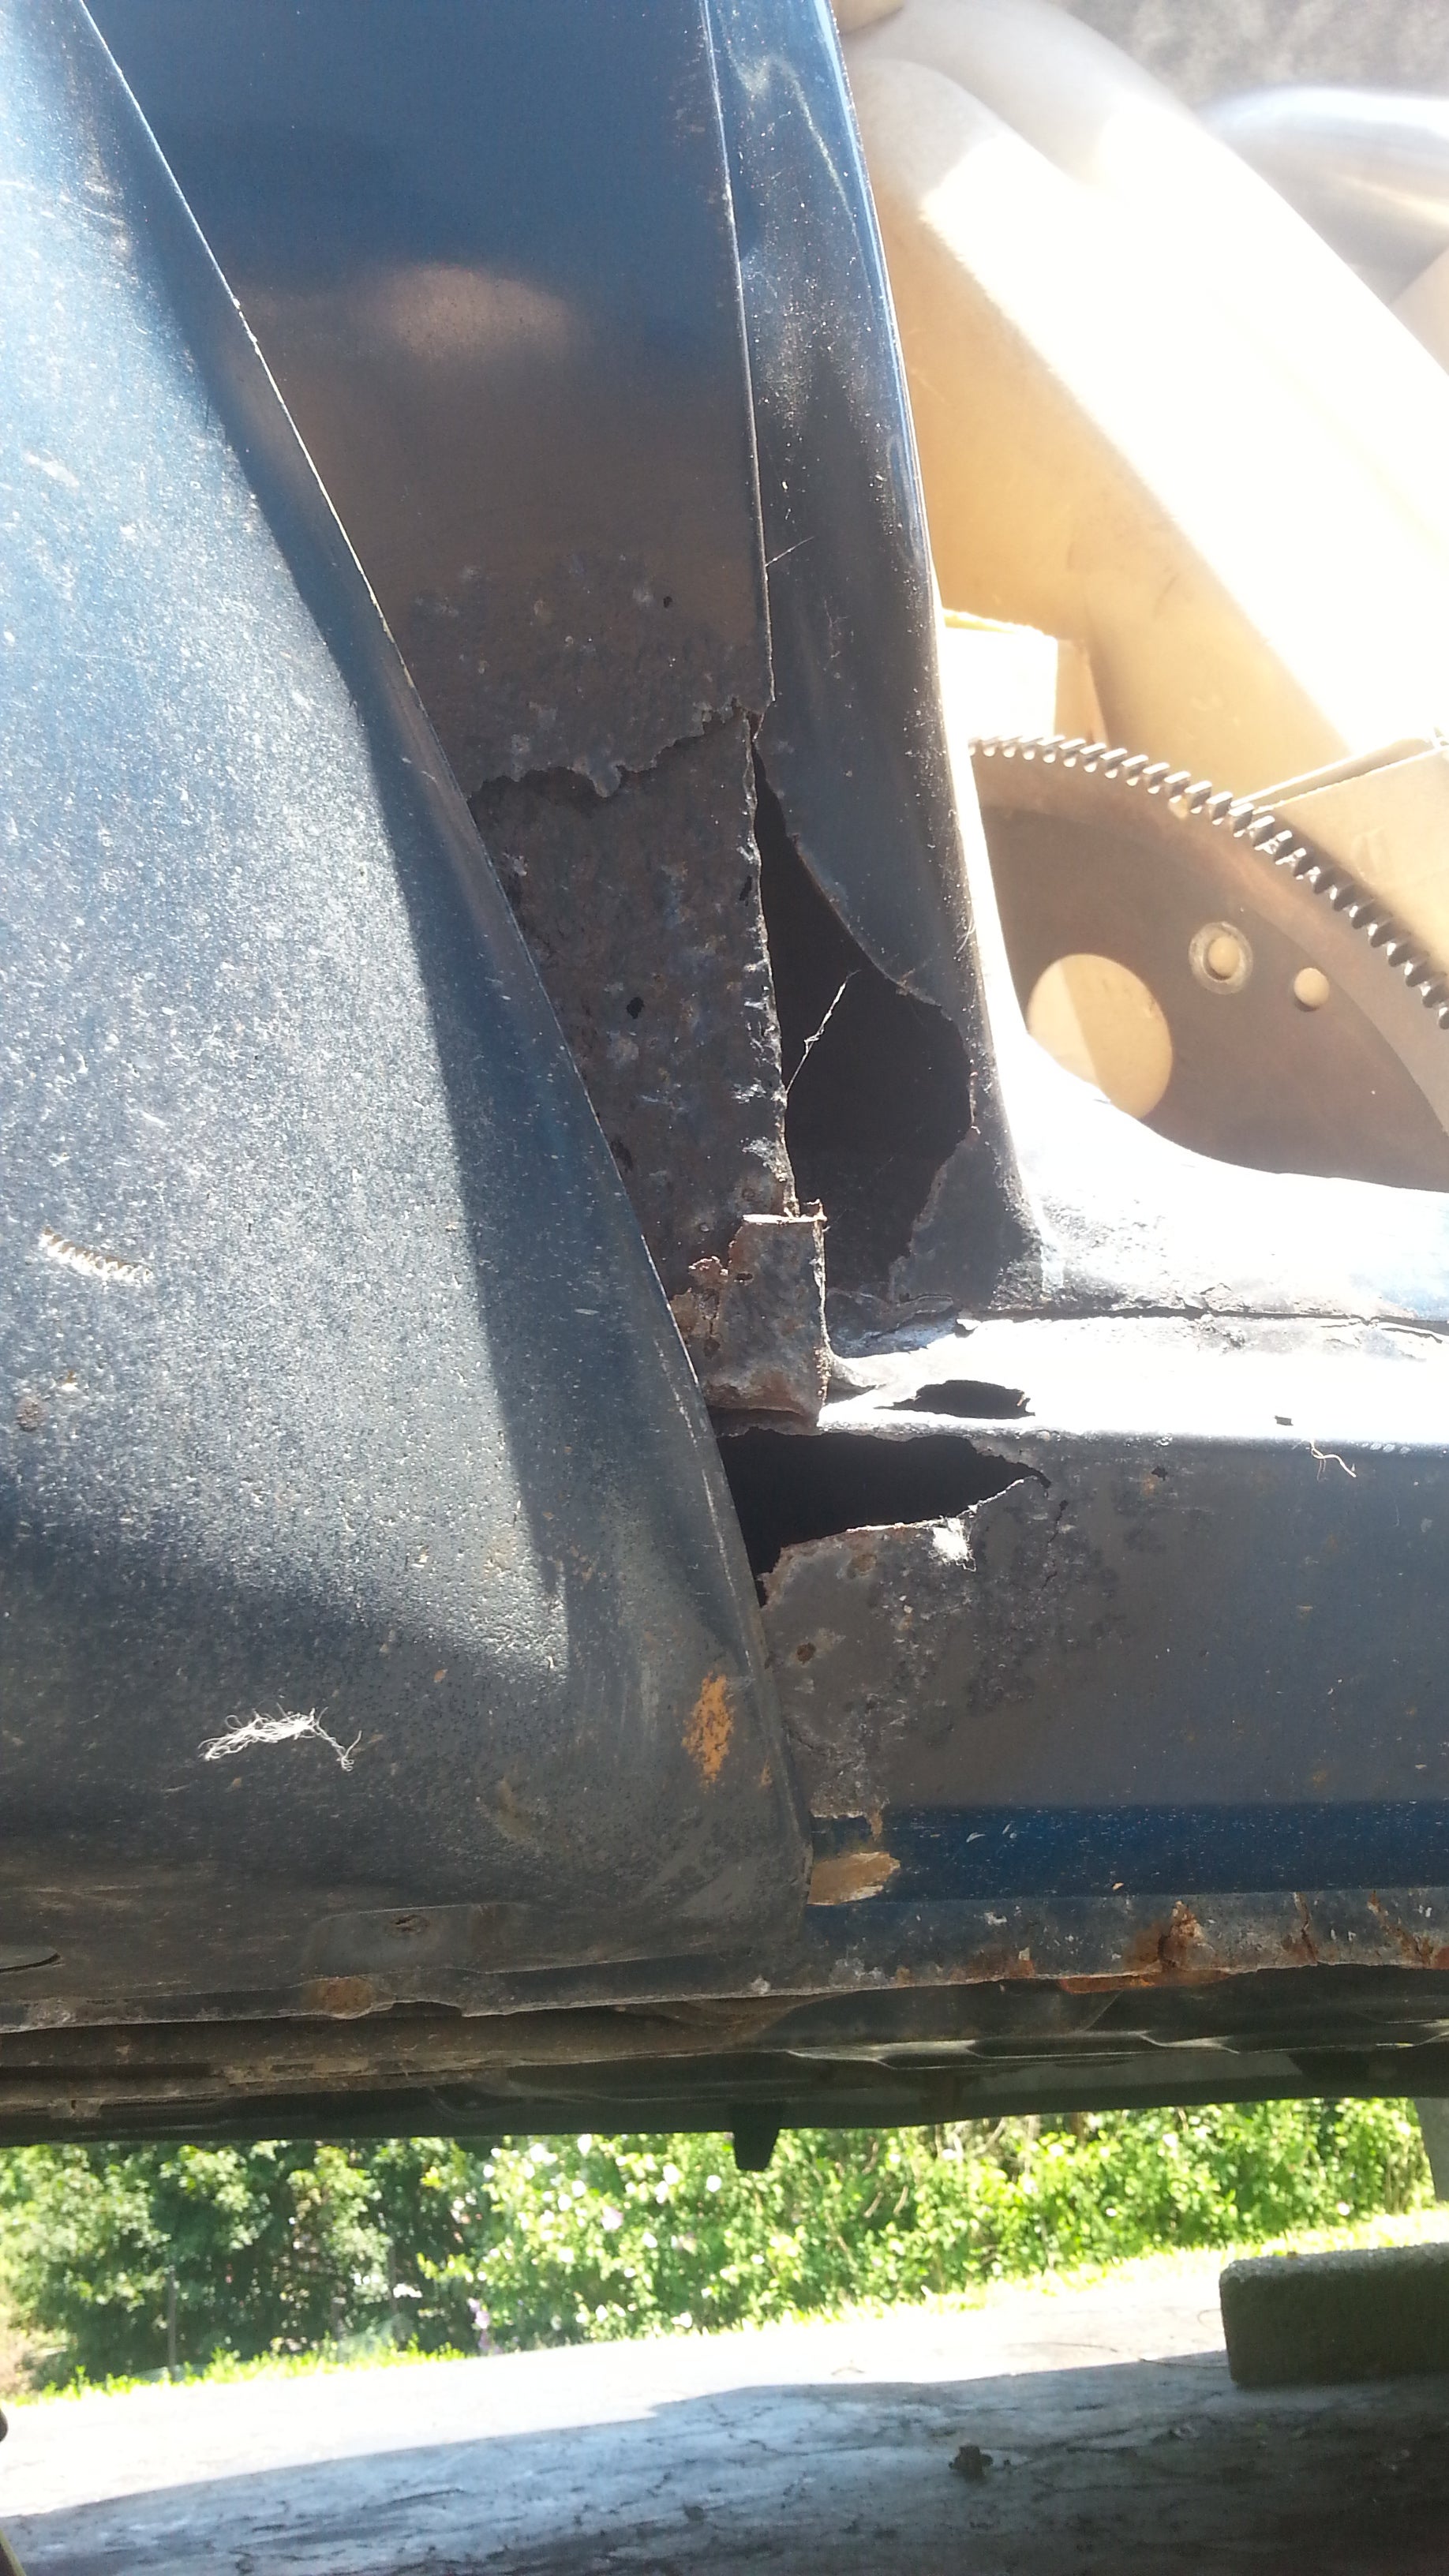
Probably a full quareter because its eaten on the corner inside the door jamb onto the outside edge. Outer rocker is mostly rust in that area as well.
|
crowmolly
> My bird IS the word
07/20/2018 at 12:32 |
|
Might be a section and patch. That’s not as bad.
I dug through your previous posts and can’t seem to find a shot of the problem area. FWIW none of the shots of the car from either side have anything that screams “this dude is fuuuuuuuuuuuuuuuucked”. Nothing even close.
|
My bird IS the word
> crowmolly
07/20/2018 at 12:35 |
|

Borked
|
crowmolly
> My bird IS the word
07/20/2018 at 12:40 |
|
Full quarter and an outer rocker, yeah. They have to go.
For what it’s worth, if the quarter is coming off that’s part of the labor involved in a new tail panel, too.
I’d consider just buying new doors if they are messed up.
|
My bird IS the word
> crowmolly
07/20/2018 at 12:47 |
|
I guess I’d have to ask the cost of repair vs cost of a new door but I’d bet money new door is easier. Not like I have to worry about panel gaps lol.
|
My bird IS the word
> crowmolly
07/20/2018 at 12:49 |
|
I didn’t post many shots of the rust. I was planning on doing a more detailed post when I got the car running, but that was like three years ago. Until then I try not to show it off that much, considering it’s not really a car at this point.
|
crowmolly
> My bird IS the word
07/20/2018 at 12:53 |
|
It is. Skinning a door will be much more expensive then a new 2nd gen door. I think the Bird/Camaro door is exactly the same. Heavy as fuck.
|
crowmolly
> My bird IS the word
07/20/2018 at 12:54 |
|
Nah, screw that. :)
If you’ve got rust repair questions post em up.
Me, Rust & Dust, Die-Trying, Ramblin, Rustholes-are-reduction, and a few others on here can give you some answers. For what it’s worth, most (if not all) of that group have dragged home far worse stuff that you’re showing here.
|
My bird IS the word
> crowmolly
07/20/2018 at 12:59 |
|
I have new hinge pins sitting around
for them, this does have the typical second gen door sag.
|
My bird IS the word
> crowmolly
07/20/2018 at 13:00 |
|
Honestly I’m gonna farm the body work out. Part swaps I will do blind but anything fabrication or handmade.... I don’t have the skills and I don’t want to do anything twice. I can do the interior stuff no problem as well.
|
crowmolly
> My bird IS the word
07/20/2018 at 13:06 |
|
Oh, I figured that.
Just as far as what’s involved, what’s a fair price, the body shop said abc but they can also do xyz for a better or cheaper job , etc.
|
My bird IS the word
> crowmolly
07/20/2018 at 13:12 |
|
Well, If this site is still around
when
IF I ever get the 20k for bodywork and paint, I’ll make sure to do that.
|
crowmolly
> My bird IS the word
07/20/2018 at 13:19 |
|
In the meantime, Rage gold and Plasti-Dip.
Oh, and sorry if it seems like I’m all in your face about this. Just digging your project, that’s all.